This step-by-step guide will walk you through the ChannelReply-Zendesk integration process. Once you've finished, you'll be able to connect Amazon, eBay, Shopify, Walmart, Back Market, Newegg, Etsy, WooCommerce, Octopia, Mirakl and TikTok with Zendesk.
Click on any screenshot to see the full-sized image.
1. Sign In
You’ll first need to sign in to ChannelReply. (If you don’t have an account yet, you can start your free trial here.)
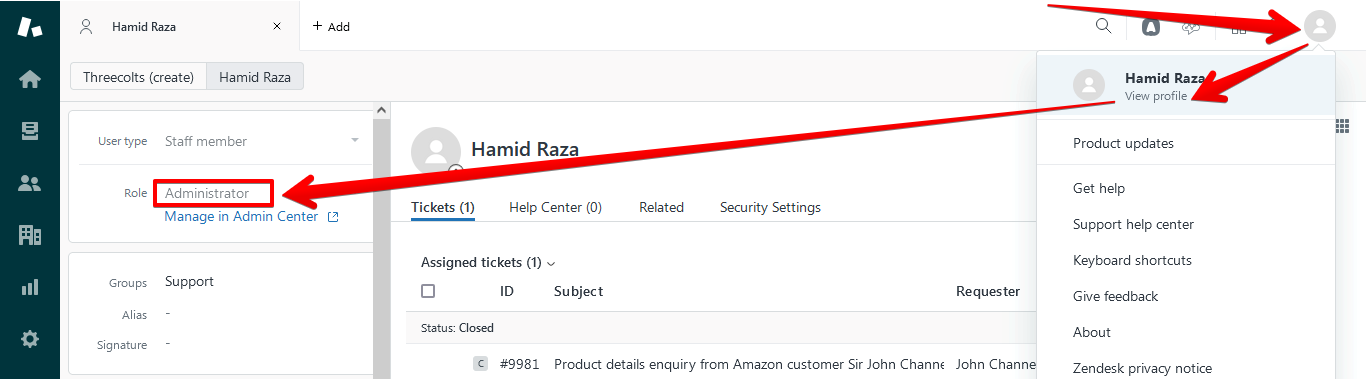
In a separate browser tab, log in to your Zendesk account as an administrator.
To make sure you're an administrator, click on your profile picture in the upper right after signing in to Zendesk. Then click "View Profile." Make sure the "Role" shown on the left is "Administrator."
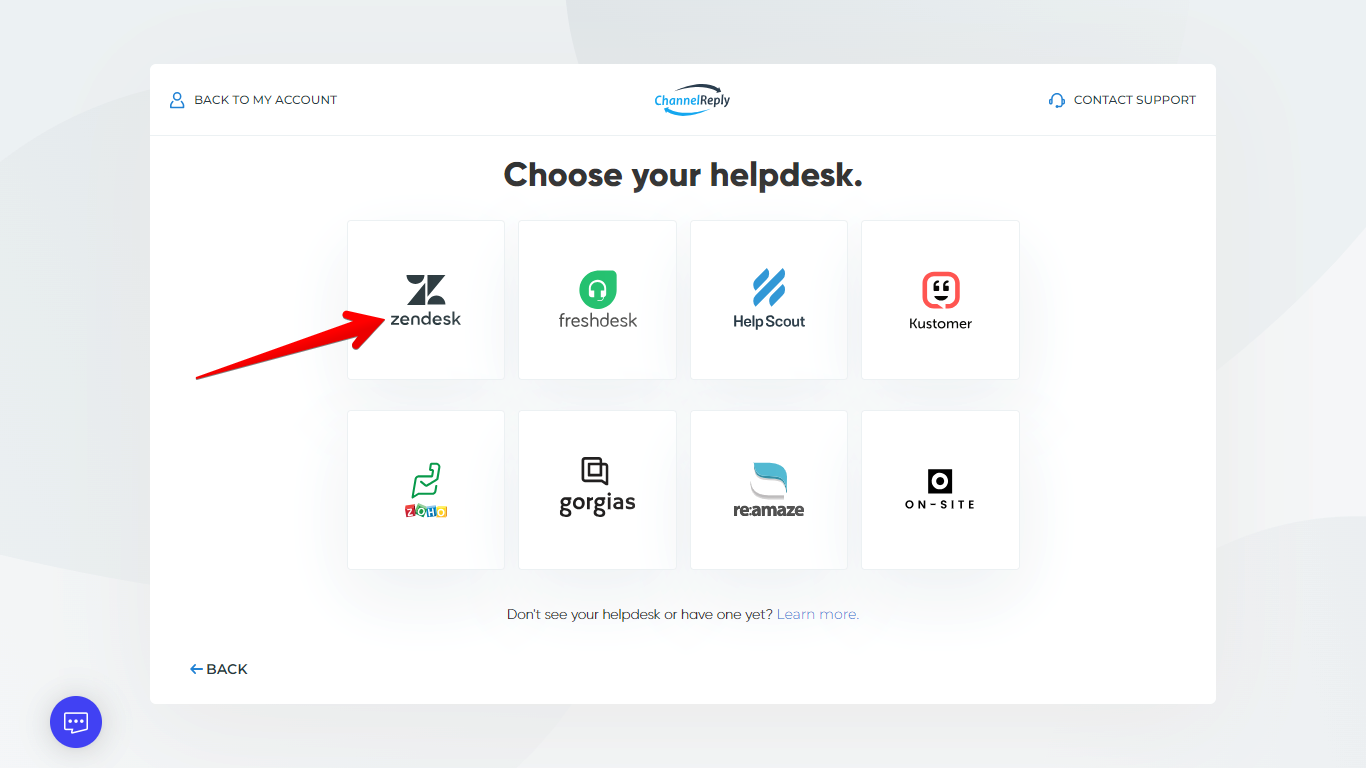
2. Select Zendesk
Select Zendesk from the list of helpdesks. You can do this during the introduction, right after you create your account:
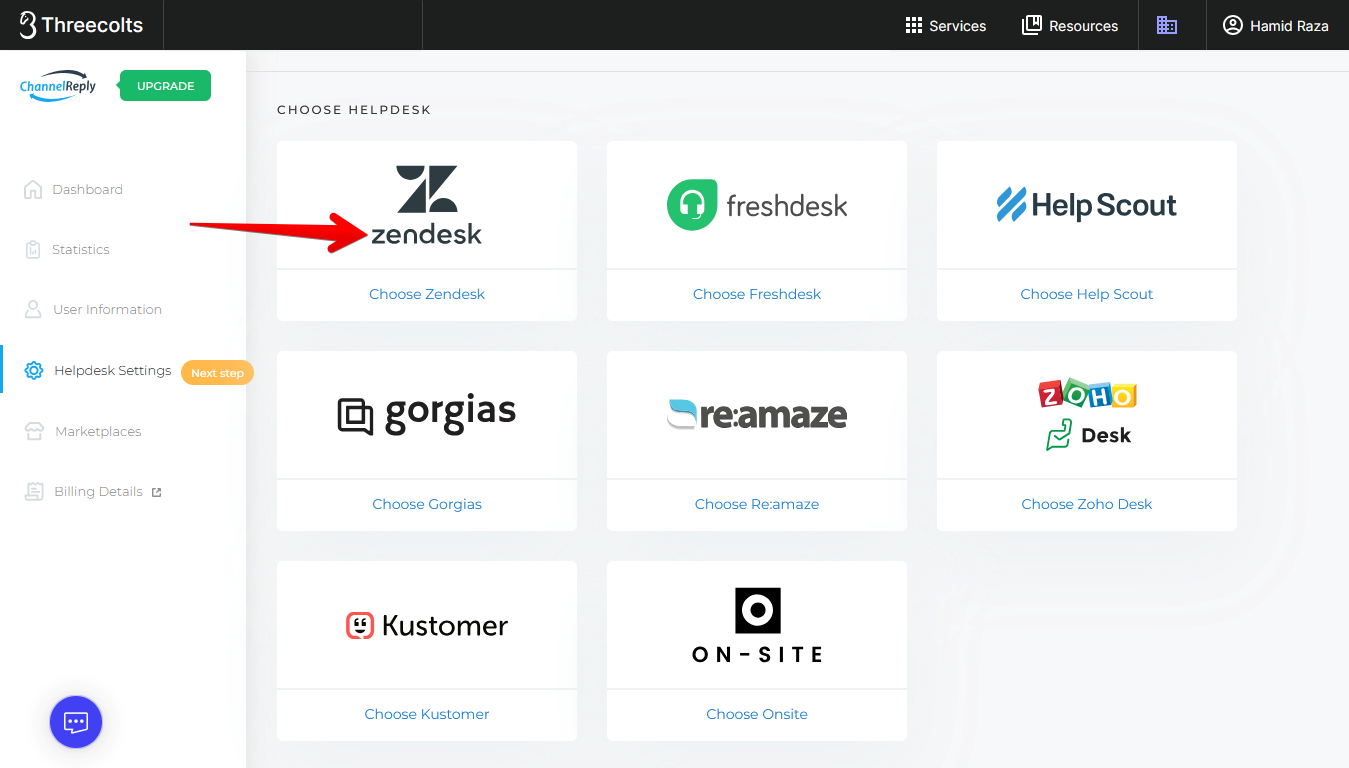
Alternatively, you can do it from the ChannelReply dashboard:
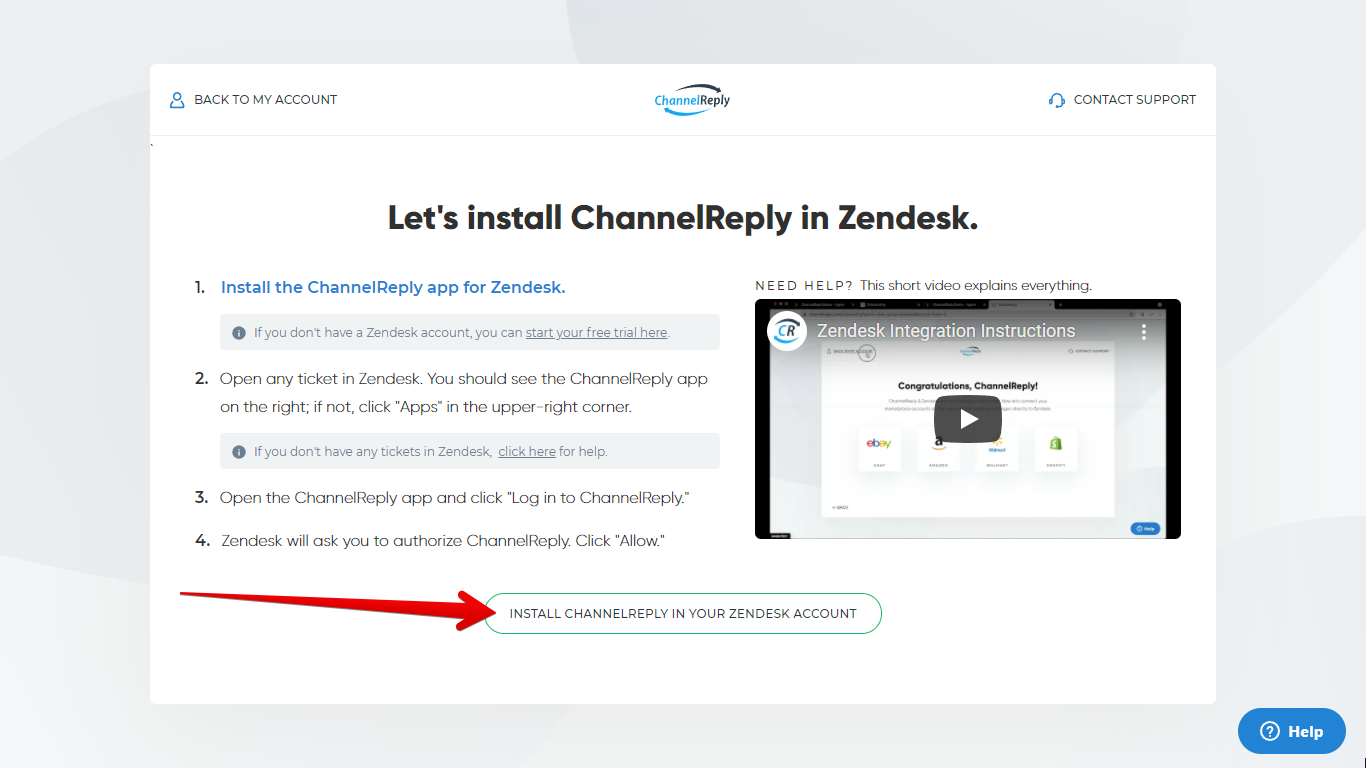
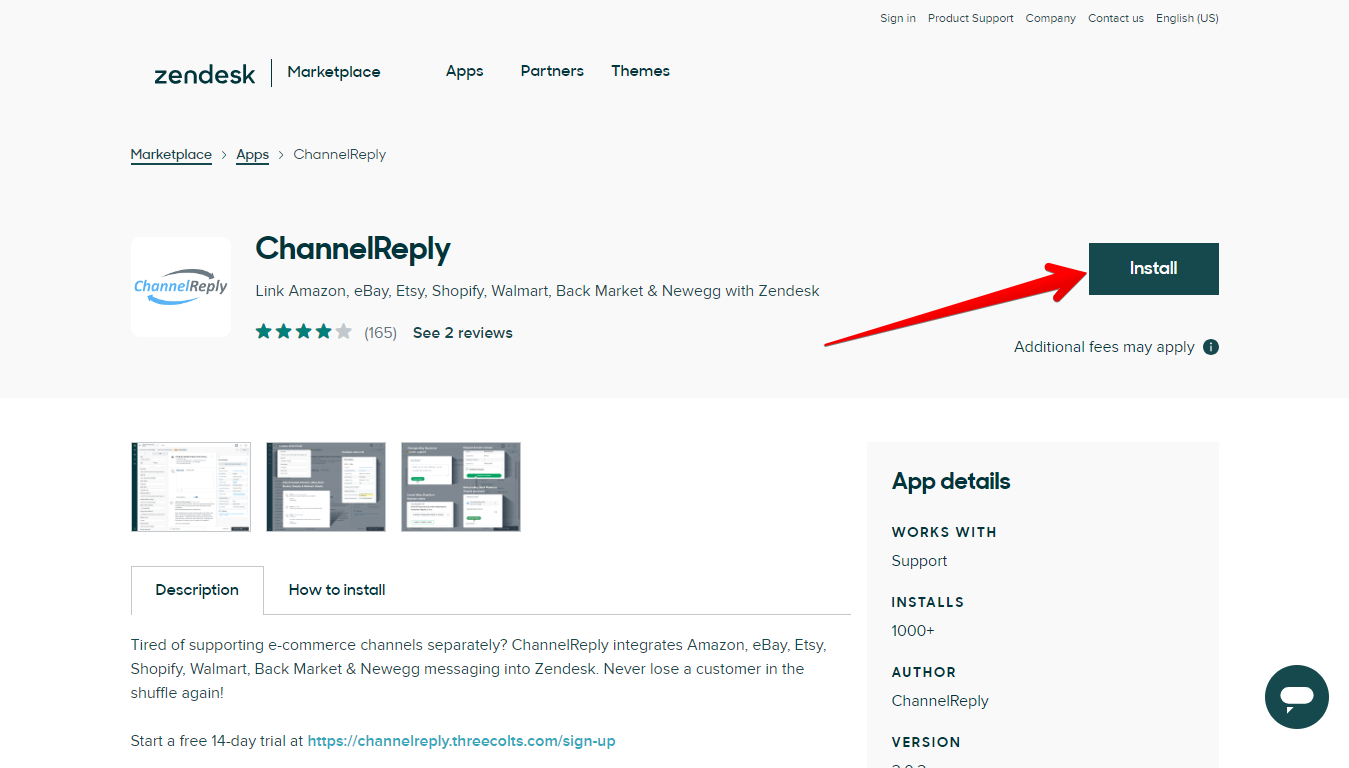
3. Install the ChannelReply App for Zendesk
After choosing Zendesk, click “INSTALL CHANNELREPLY IN YOUR ZENDESK ACCOUNT."
You’ll arrive on the page for our app in the Zendesk marketplace. The app itself is free—there are no further charges for installing it. Click on the “Install” button to begin.
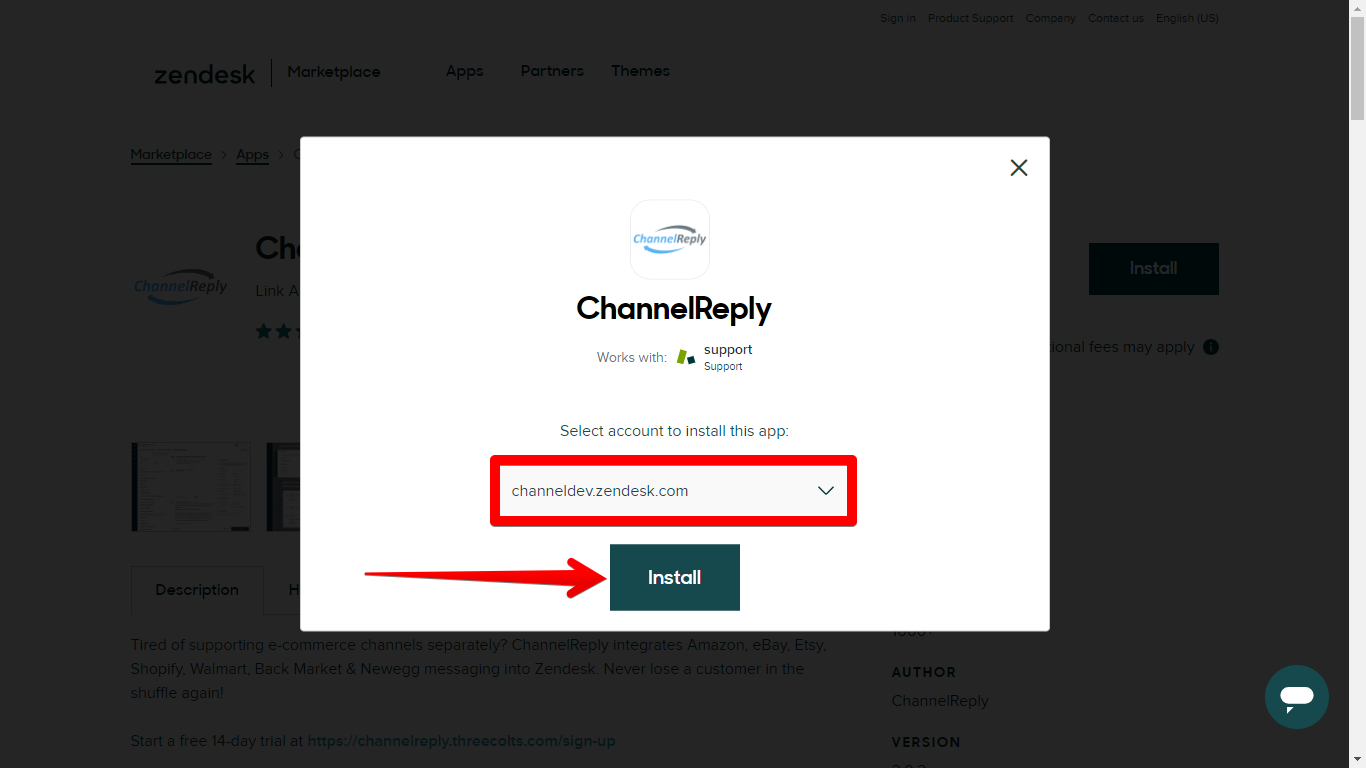
On the next page, make sure the correct Zendesk account is selected, then click “Install.”
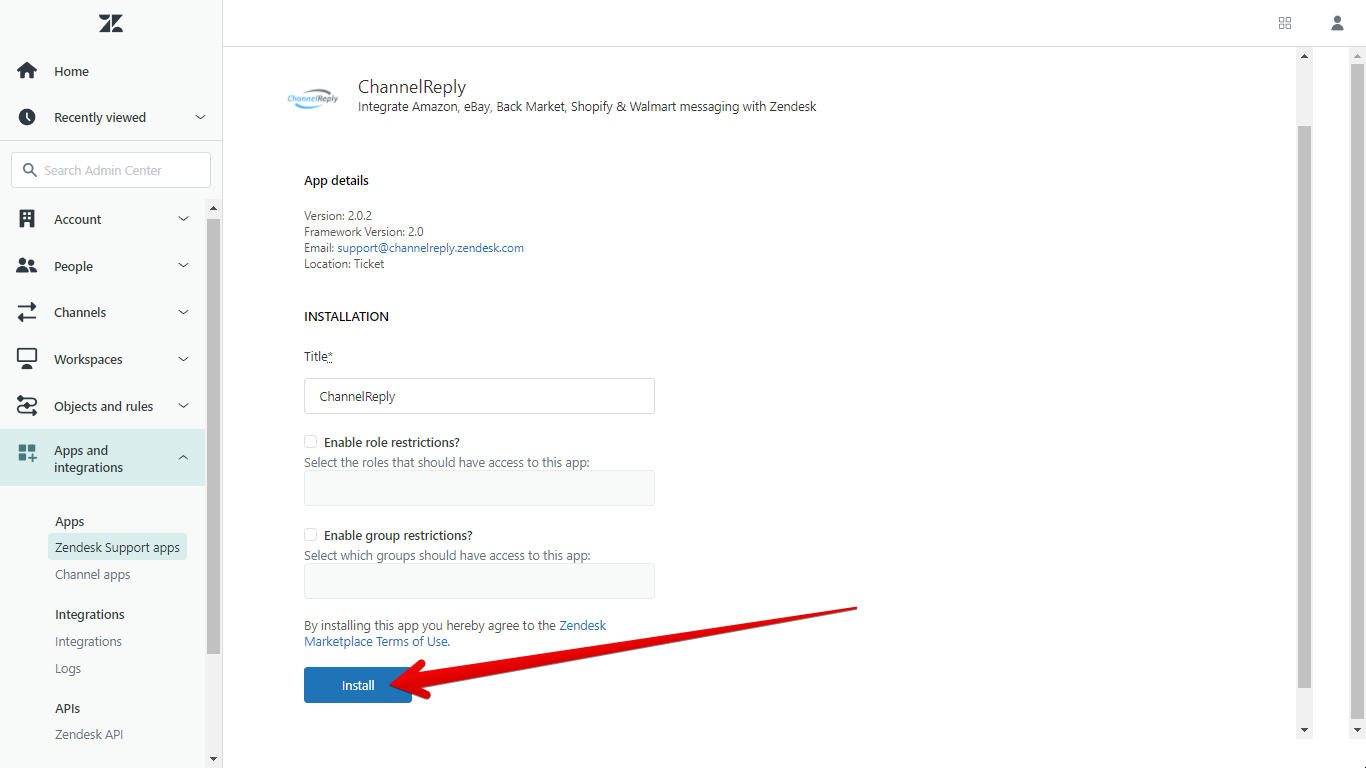
Zendesk will provide you with a few options on the next page. If you’re happy with them, click “Install.”
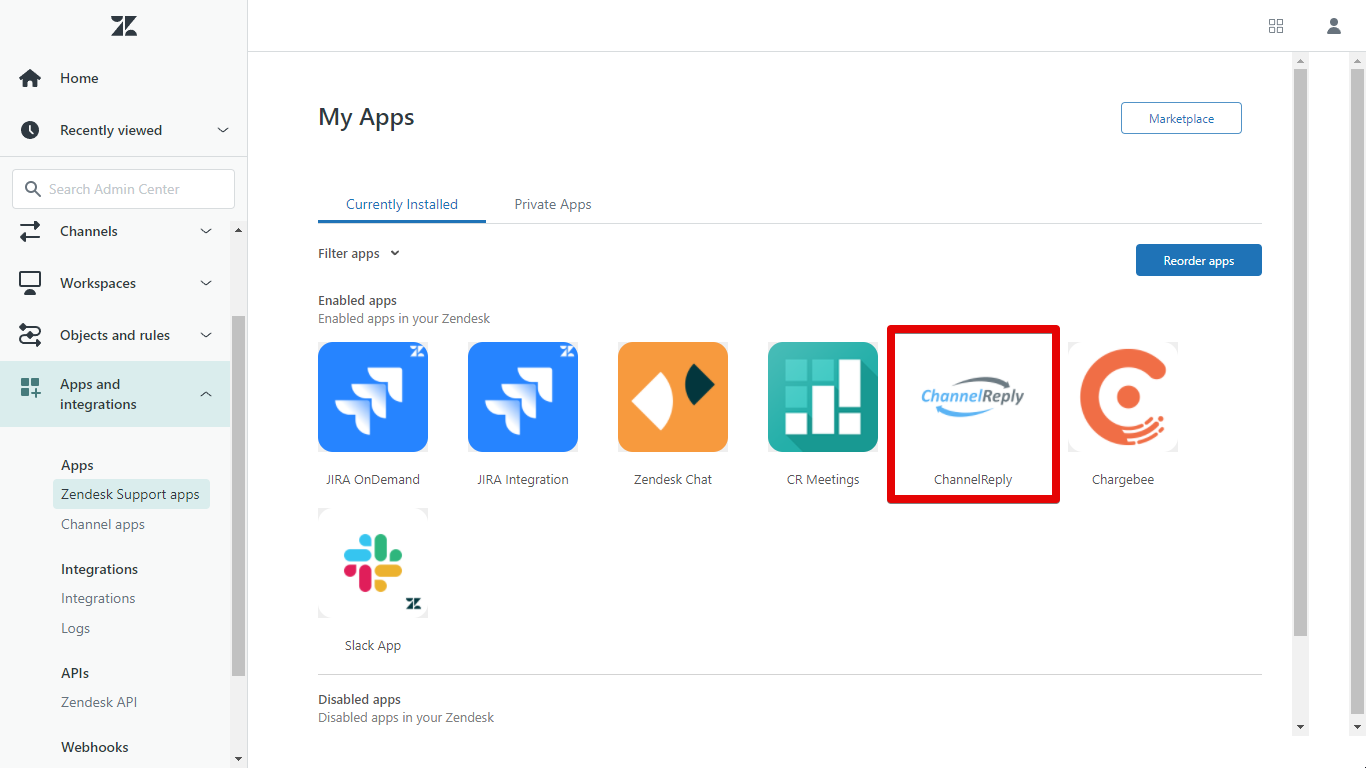
You'll see a series of loading notifications. As soon as the app has finished installing, you'll see ChannelReply in your list of currently installed apps.
4. Authorize ChannelReply in Zendesk
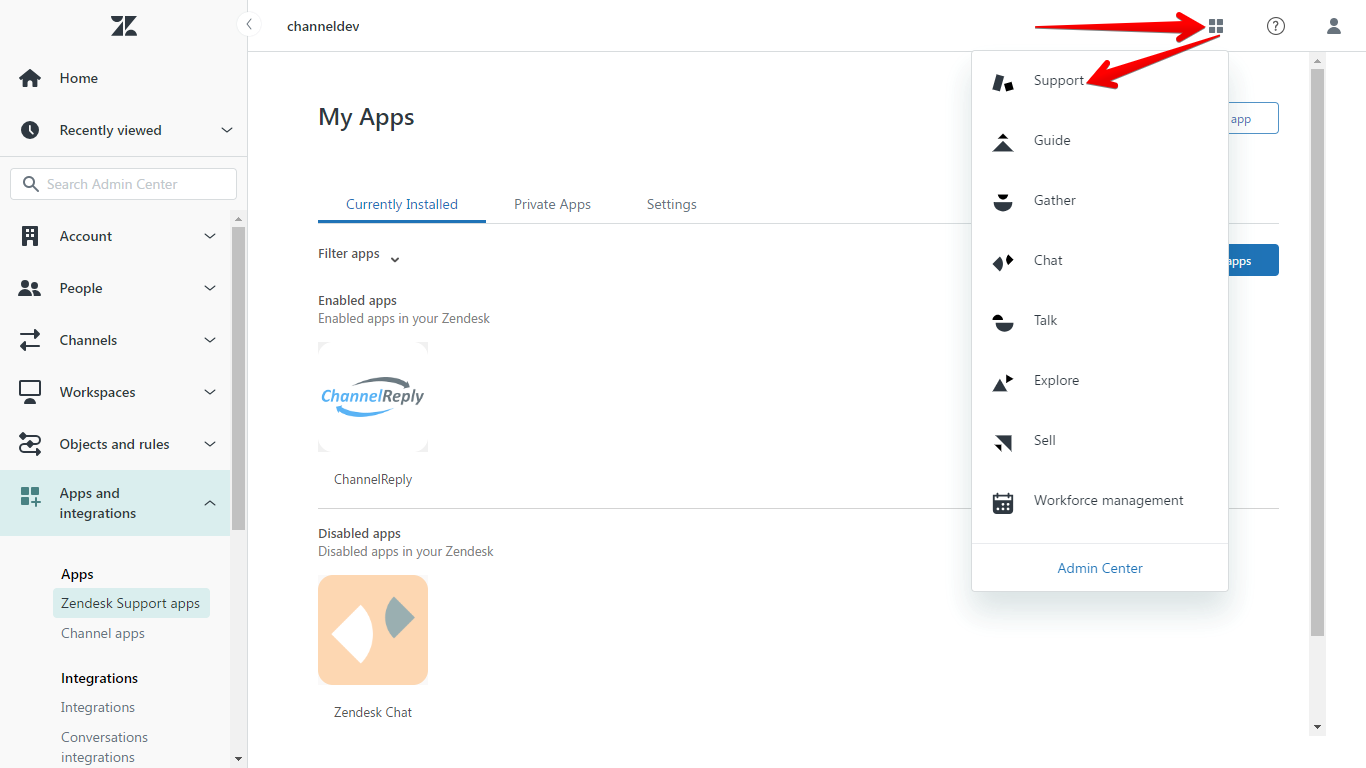
If you still have a browser tab open to your Zendesk Support account, return there now. Otherwise, click "Zendesk Products" (the four-squares icon in the upper right) in Admin Center. Then choose "Support."
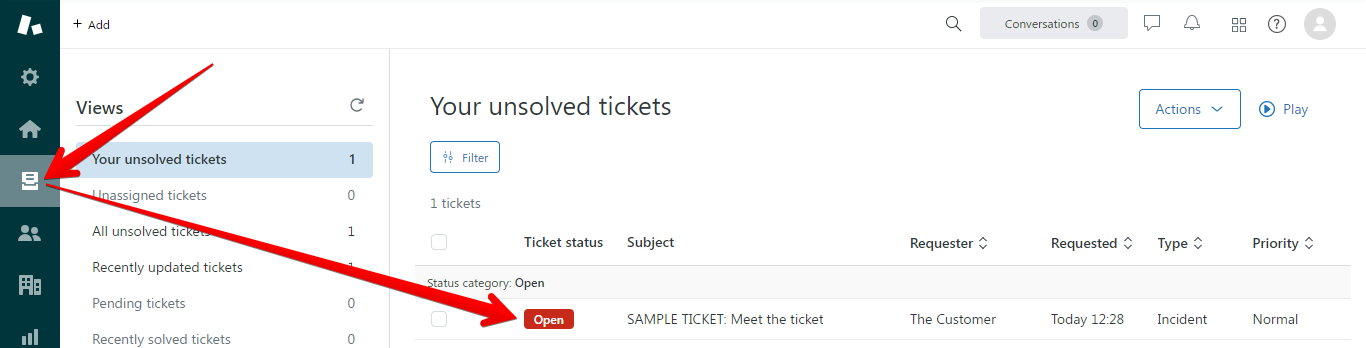
Once you're back in Zendesk Support, go to “Views” in the left-hand menu and open any ticket. (If there are no tickets in your Zendesk, please see "How to Create a Zendesk Ticket.")
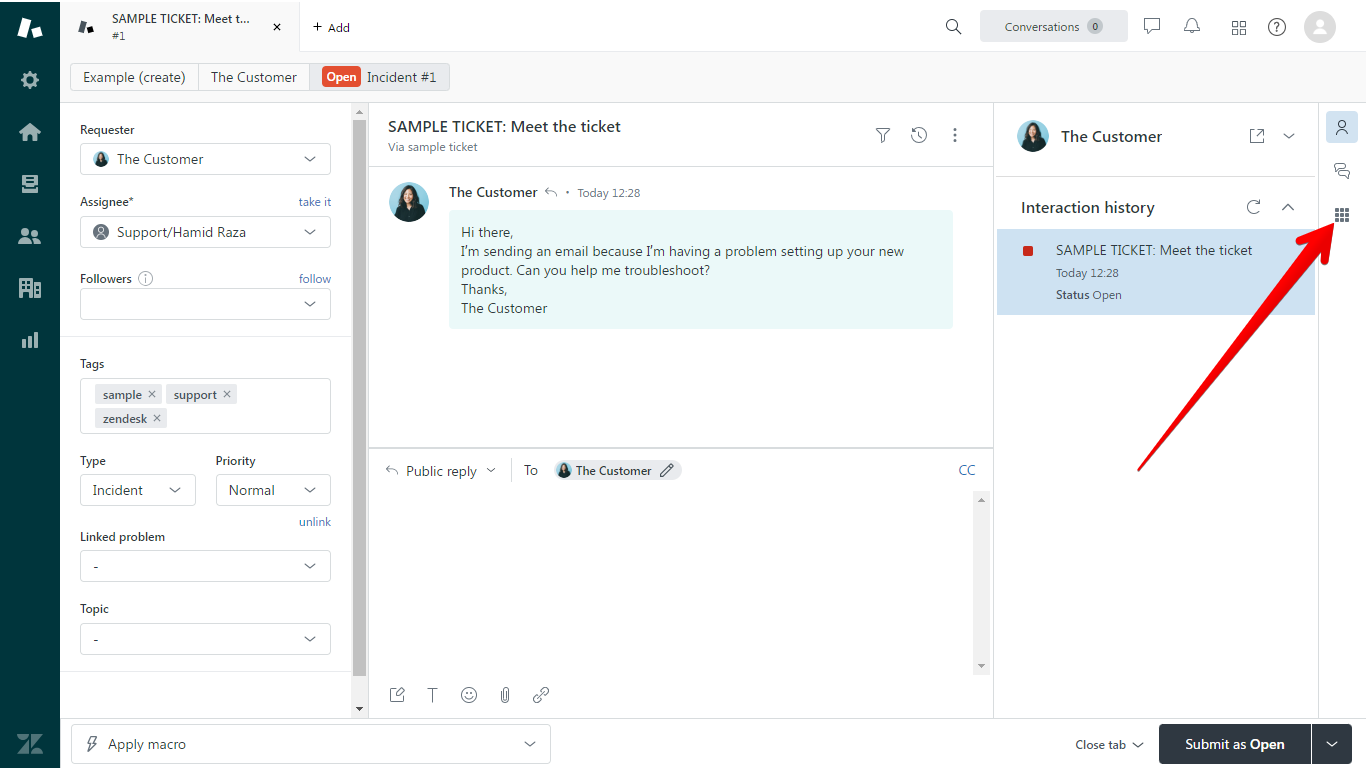
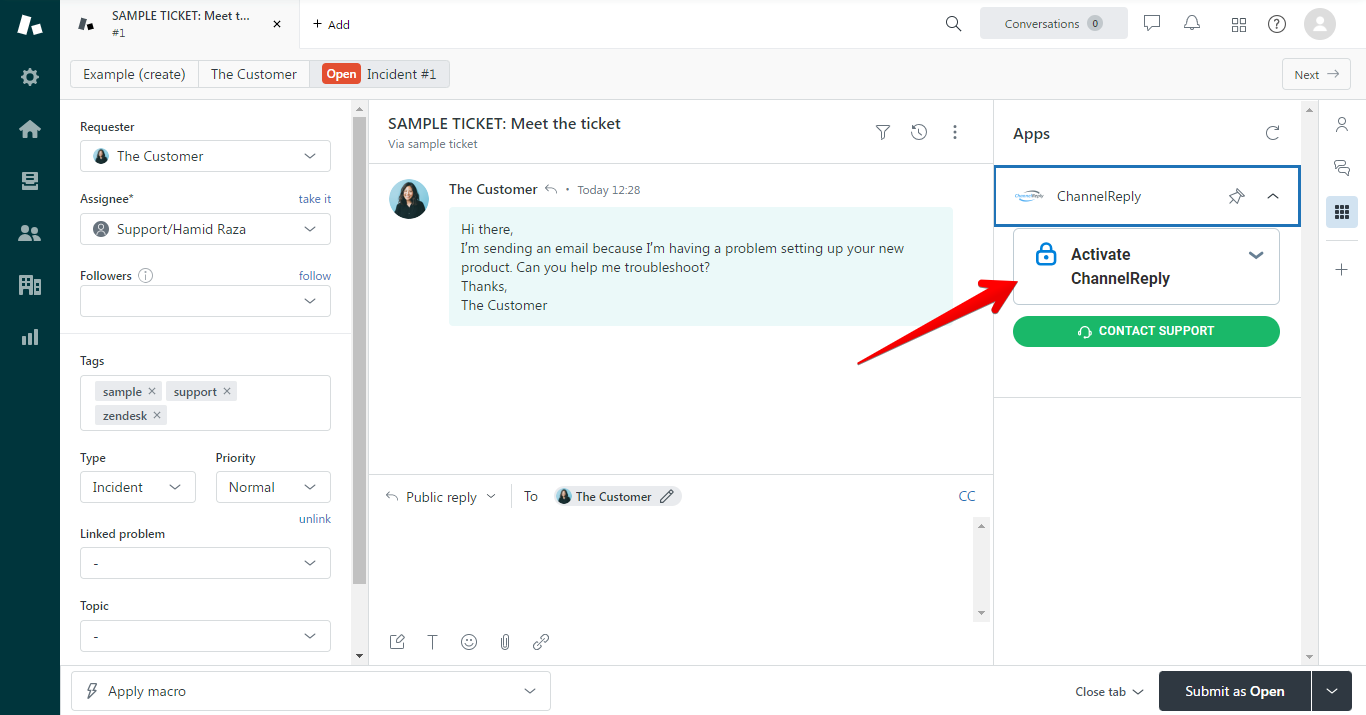
If you don't already have the apps sidebar open, click the "Apps" button in the upper right. Depending on when you created your Zendesk account, this may be an icon made of nine squares, or a button that actually says "Apps."
Above: The "Apps" button in the latest Zendesk interface. Below: The "Apps" button in the classic interface.
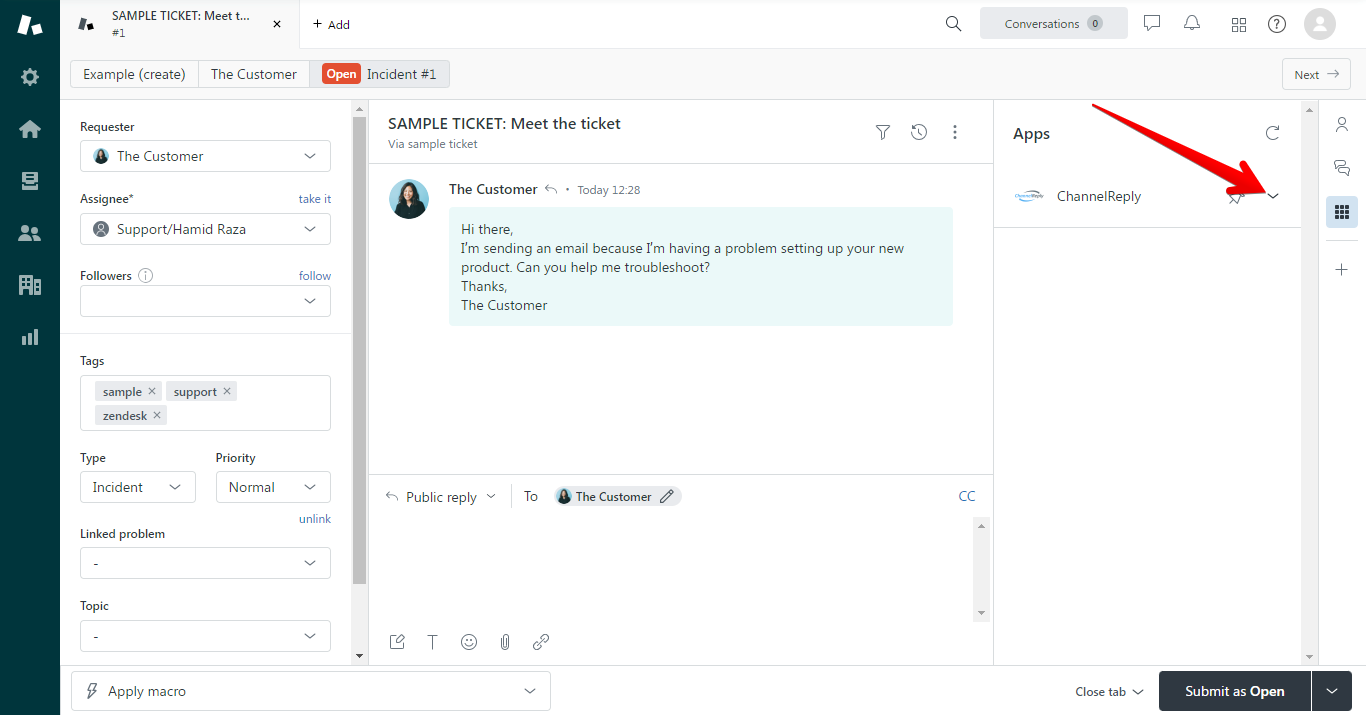
You should see an "Activate ChannelReply" button immediately. If you have several apps, though, you'll need to click on ChannelReply to unfurl it first.
Hit “Activate ChannelReply.”
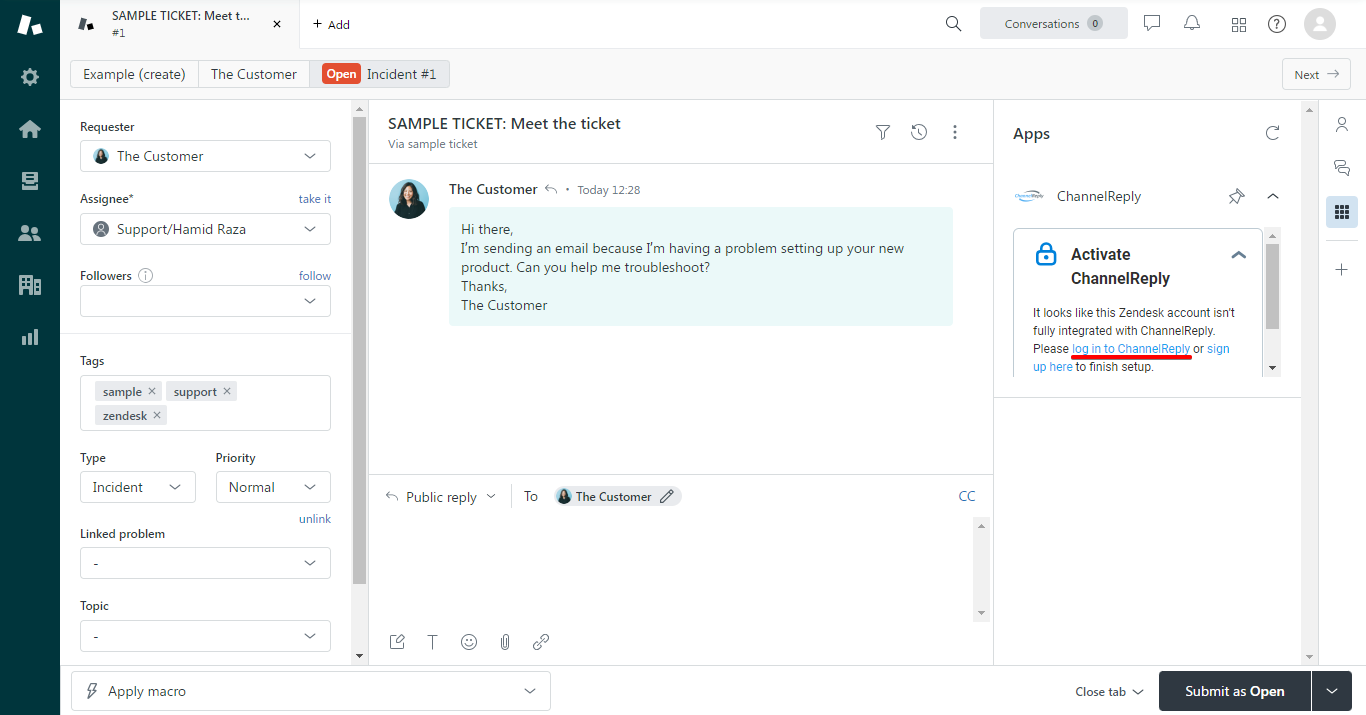
You’ll see a message asking you to log in to ChannelReply or sign up. Since you already have an account, click “log in to ChannelReply.”
You logged in earlier, so you’ll skip the login screen and go straight to the Zendesk page shown below. Click “Allow” to continue.
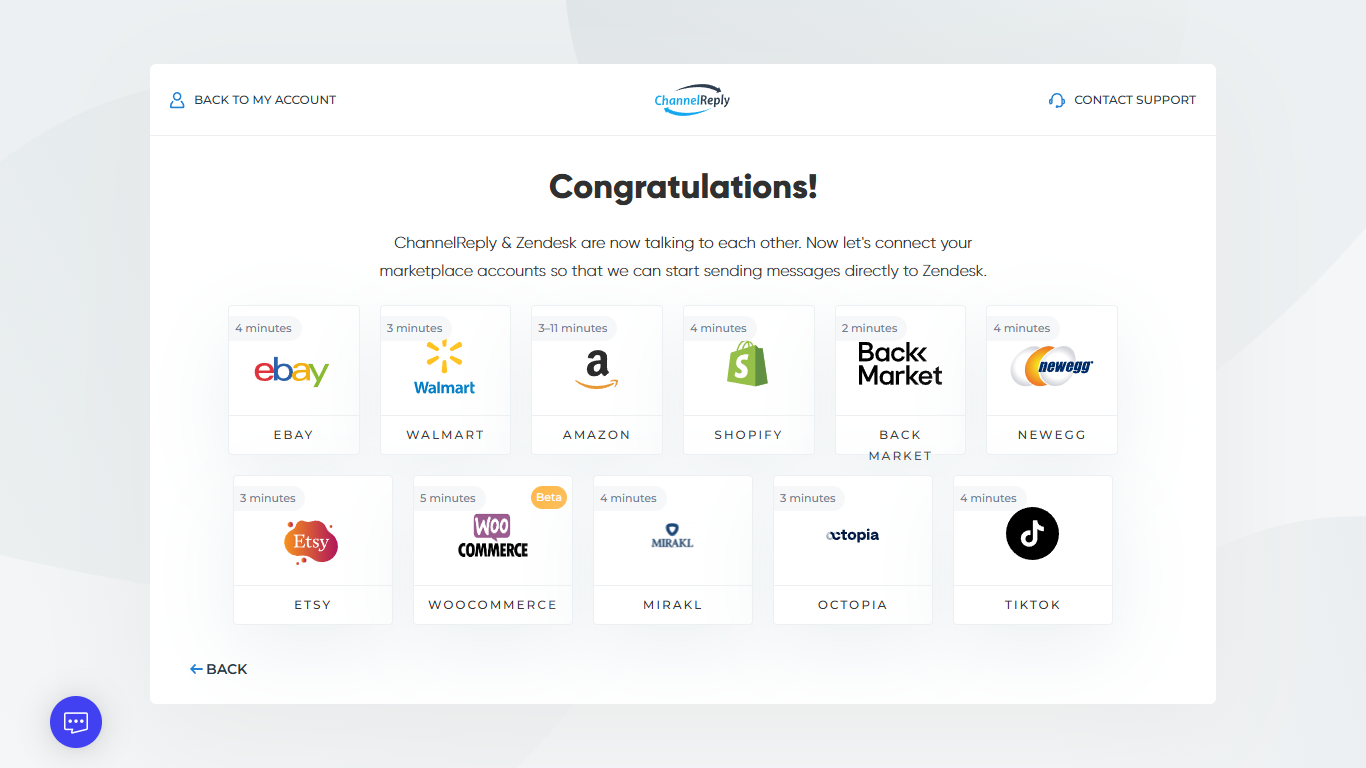
Congratulations—you have completed the Zendesk integration process! If you have never connected this Zendesk account to ChannelReply before, you'll arrive at the screen shown below. (If you're reconnecting an account, you'll be returned to your dashboard and shown a success notification instead.)
What's Next?
Here's what's left to complete setup:
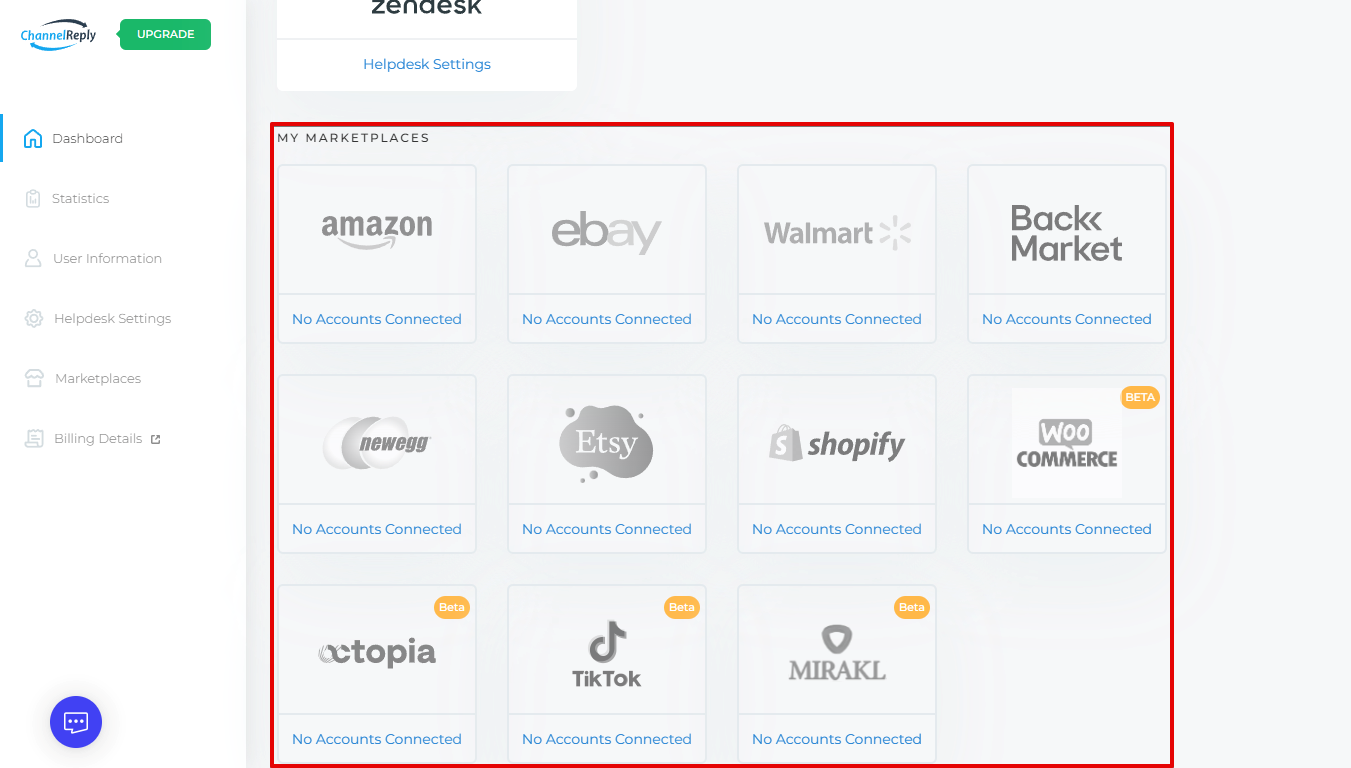
- Continue following the setup walkthrough to connect your marketplace accounts. You can also follow our written instructions for Amazon, eBay, Shopify, Walmart US, Walmart Canada, Back Market, Newegg, Etsy, WooCommerce, Octopia, Mirakl, or TikTok Shop.
- Finally, follow these instructions to make sure Zendesk’s default triggers don’t cause any trouble.
You can safely exit setup now if desired. You’ll be able to continue anytime by choosing a marketplace from your account dashboard.
If you ever need assistance, please don’t hesitate to contact us.
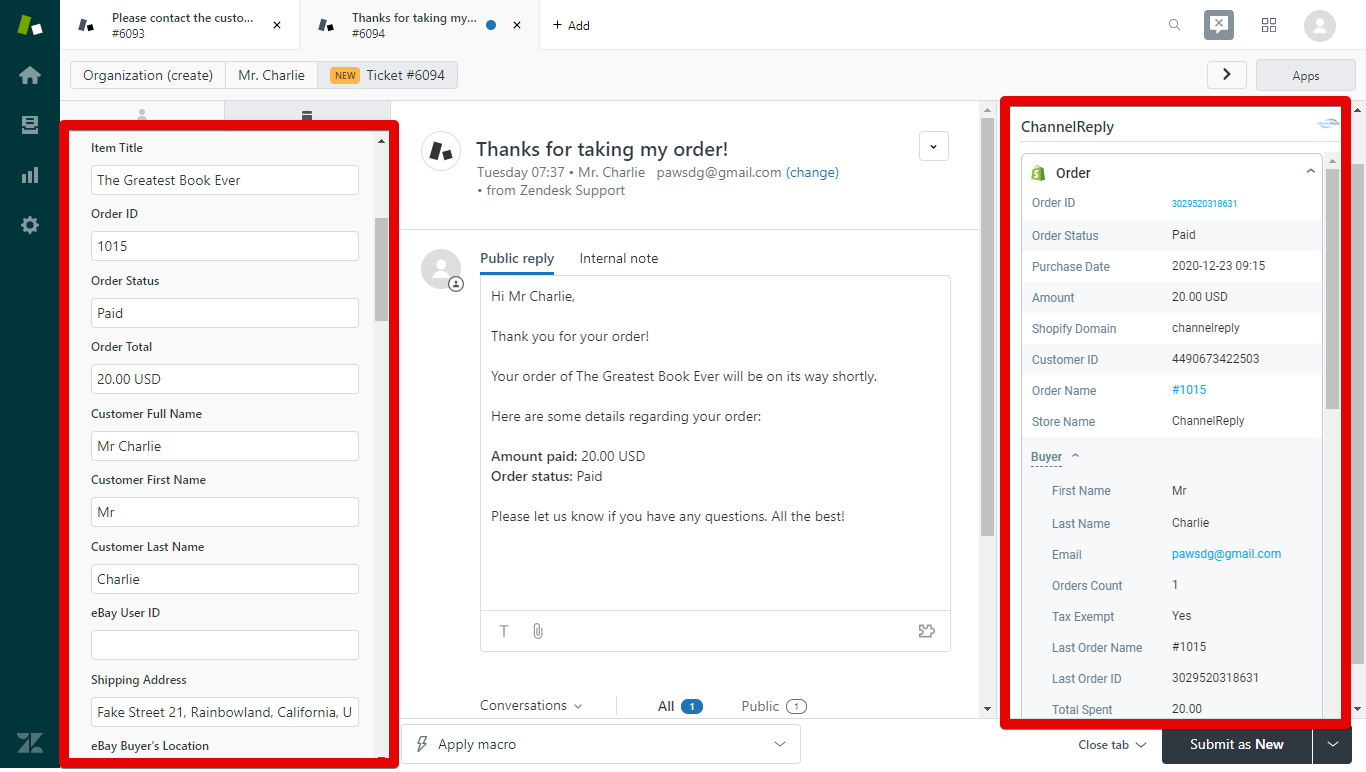
What Will ChannelReply Tickets Look Like in Zendesk?
After you've begun receiving marketplace messages, the ChannelReply app will start working. You’ll see detailed info about the customer and their order on any new buyer message where data is available.
Optional: Enter Custom Fields
One of the most powerful advanced options in Zendesk is custom fields. These allow you to automatically personalize your messages. For setup instructions, see "How to Use Custom Fields from ChannelReply in Zendesk."
Below, you’ll see what your marketplace messages will look like in Zendesk with our app installed and custom fields added. Critical information about your tickets will appear in the app on the right. You will also see the custom fields you created on the left.
What Else Can I Do with ChannelReply and Zendesk?
You can read a complete breakdown of almost all available features in "Everything You Can Do with ChannelReply in Zendesk."