ChannelReply makes it easy to manage Walmart support from your helpdesk. Just follow the instructions below to set up your Walmart US integration in minutes!
These are the instructions for Walmart US. For seller.walmart.ca accounts, see "Walmart Canada Integration Instructions." Click on any screenshot to view it at full size.
1. Get Ready
If You Already Have a ChannelReply Account
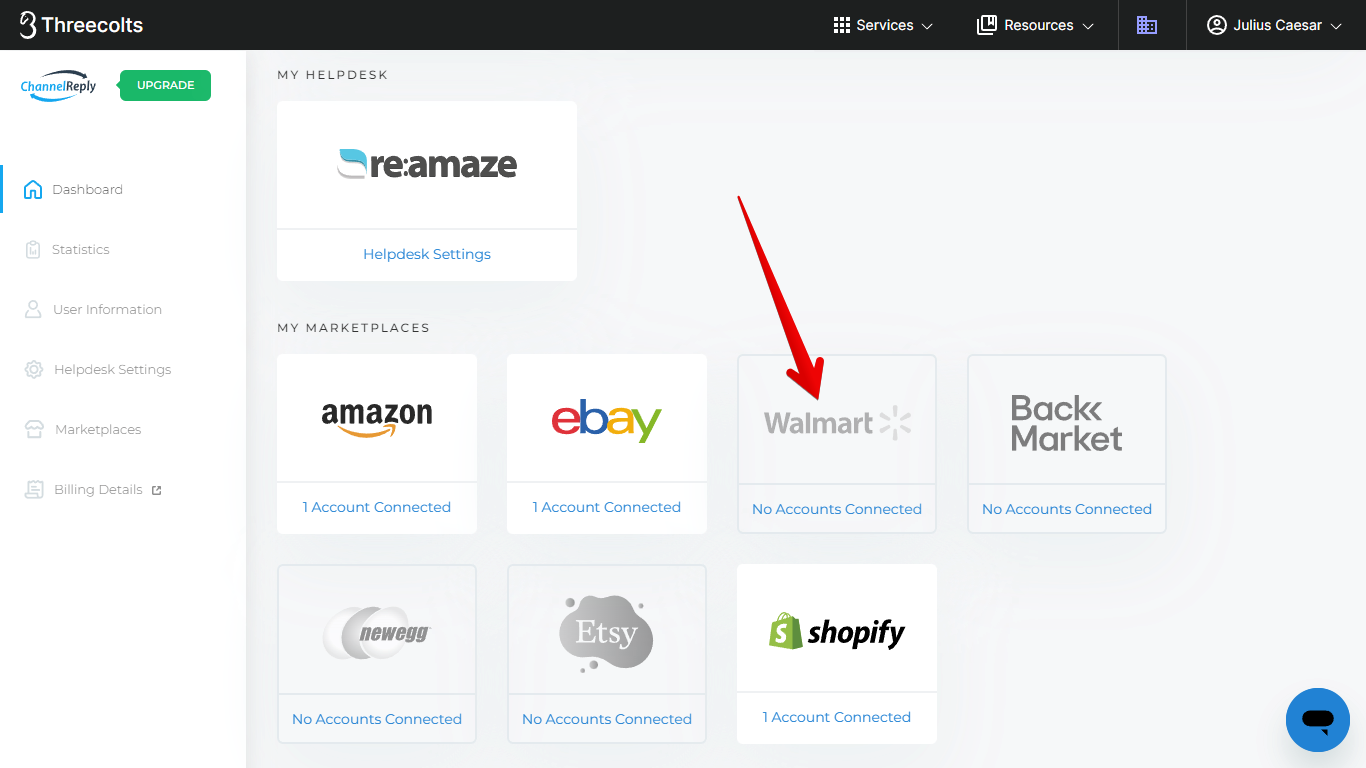
Open your ChannelReply account in a new tab. Log in if prompted, then click “Walmart” on your ChannelReply dashboard.
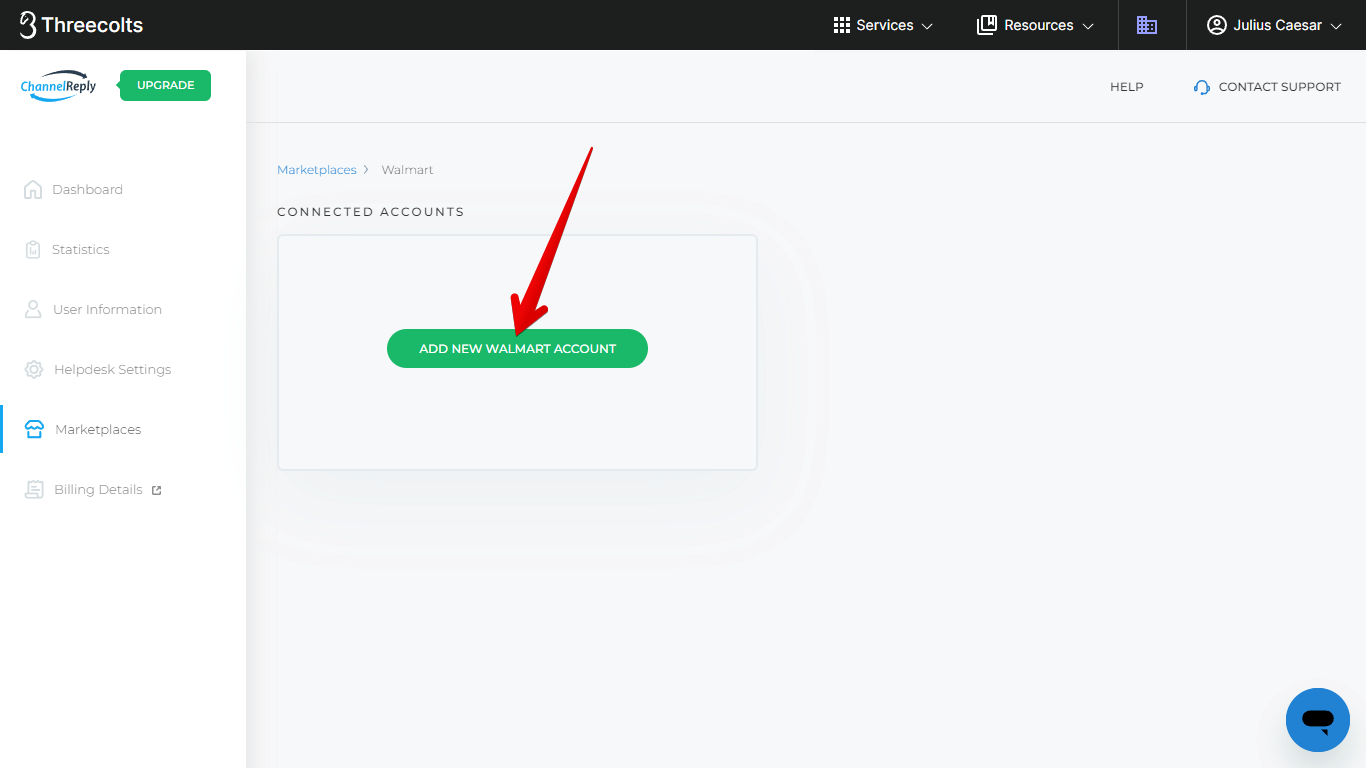
Click “Add New Walmart Account.”
If You Don’t Have an Account Yet
Start your free 14-day trial here. Then follow the prompts to connect Zendesk, Freshdesk, Help Scout, Gorgias, Re:amaze, Zoho Desk, Kustomer or Onsite Support.
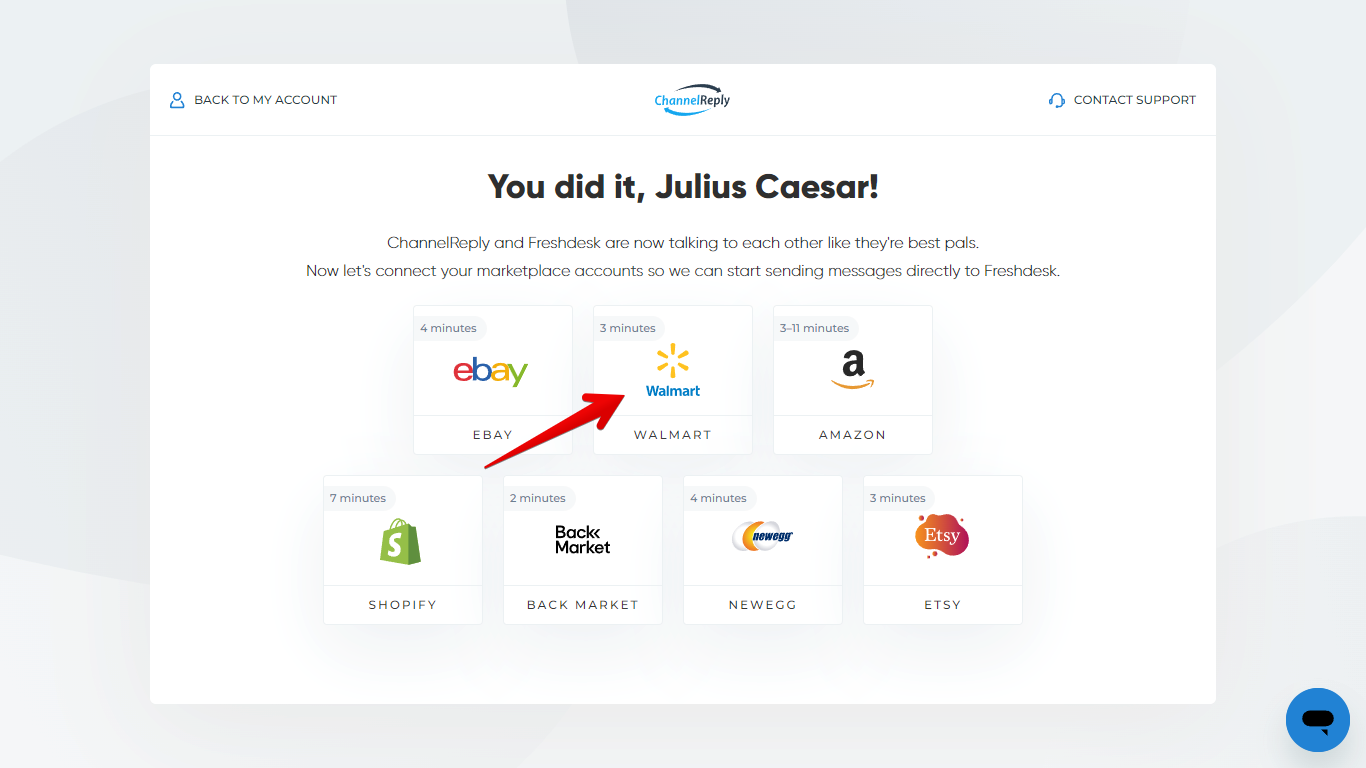
Once your helpdesk has been connected, you’ll see a screen like the one below. Click “Walmart.”
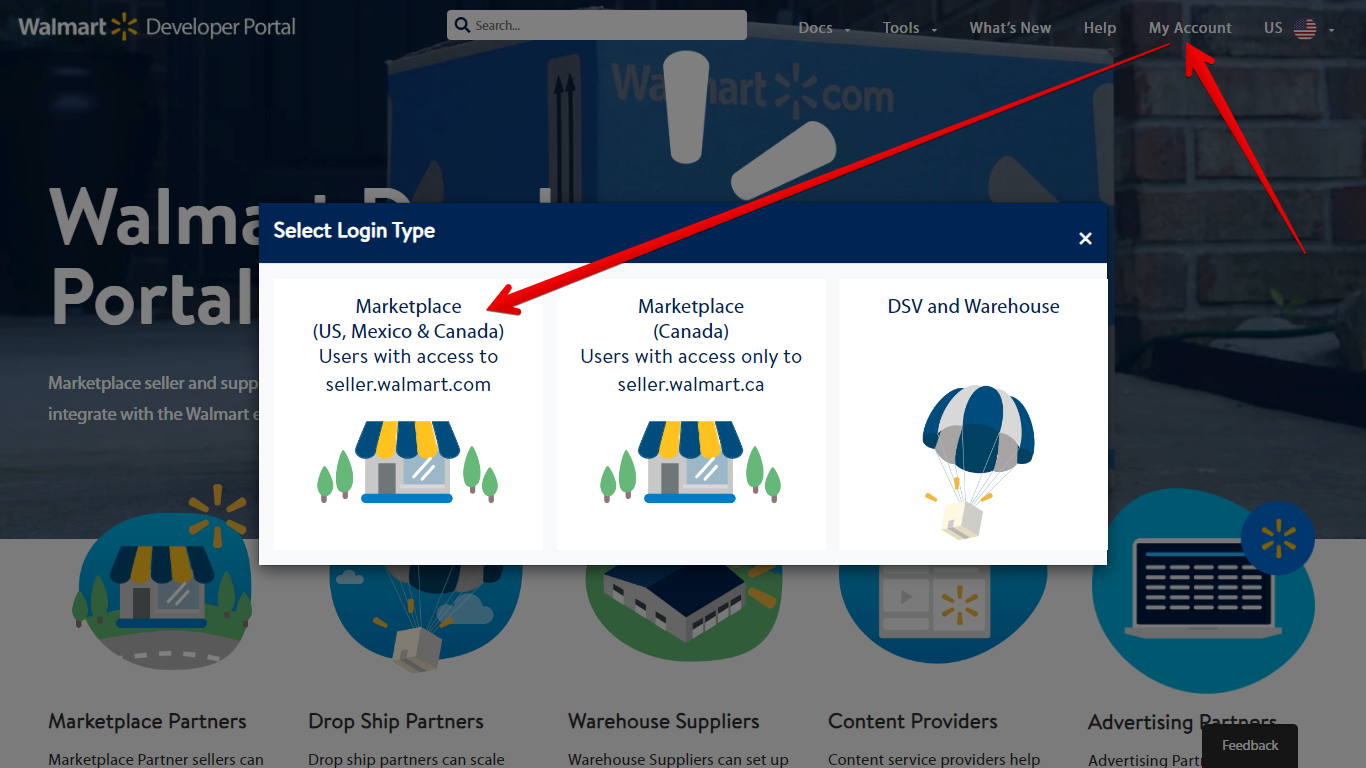
2. Connect to the Walmart US API
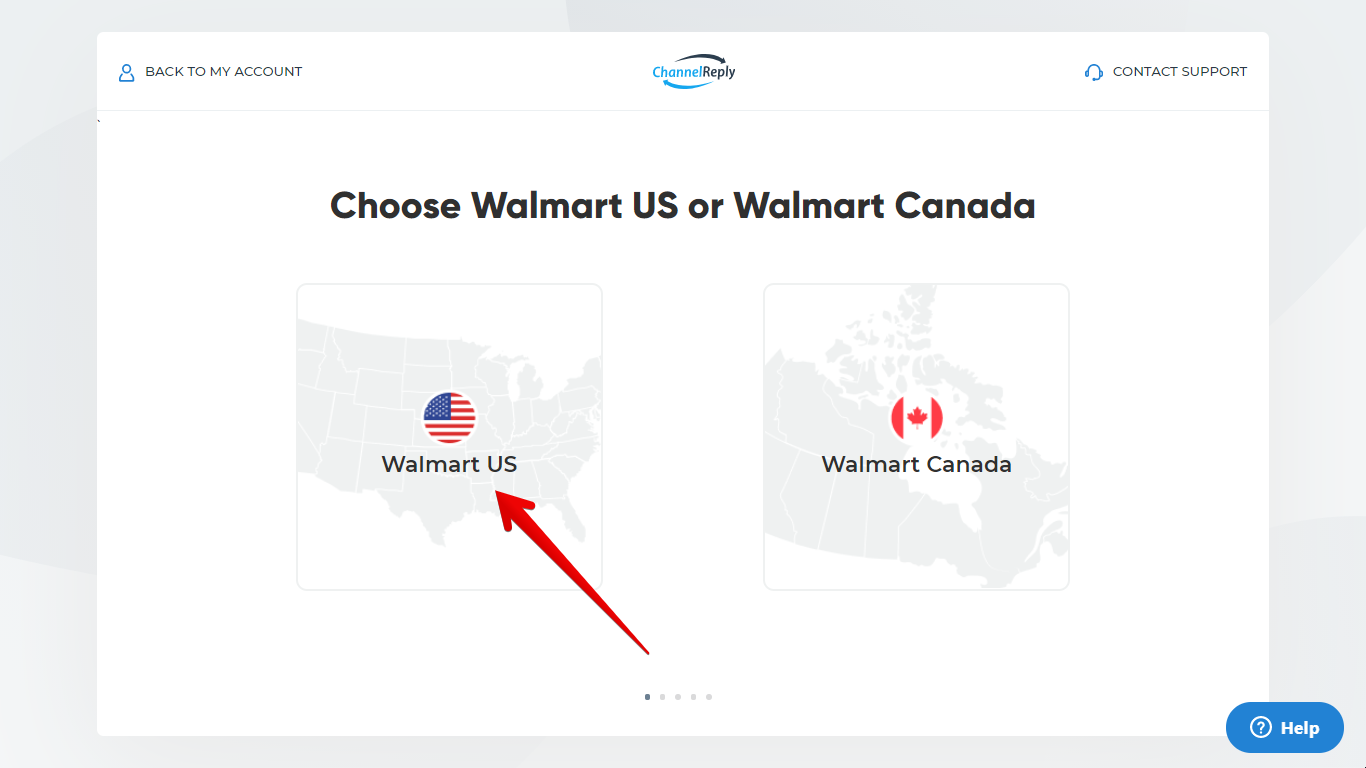
Choose “Walmart US.”
In a new browser tab, visit developer.walmart.com and click “My Account.” Then choose “Marketplace (US, Mexico & Canada).”
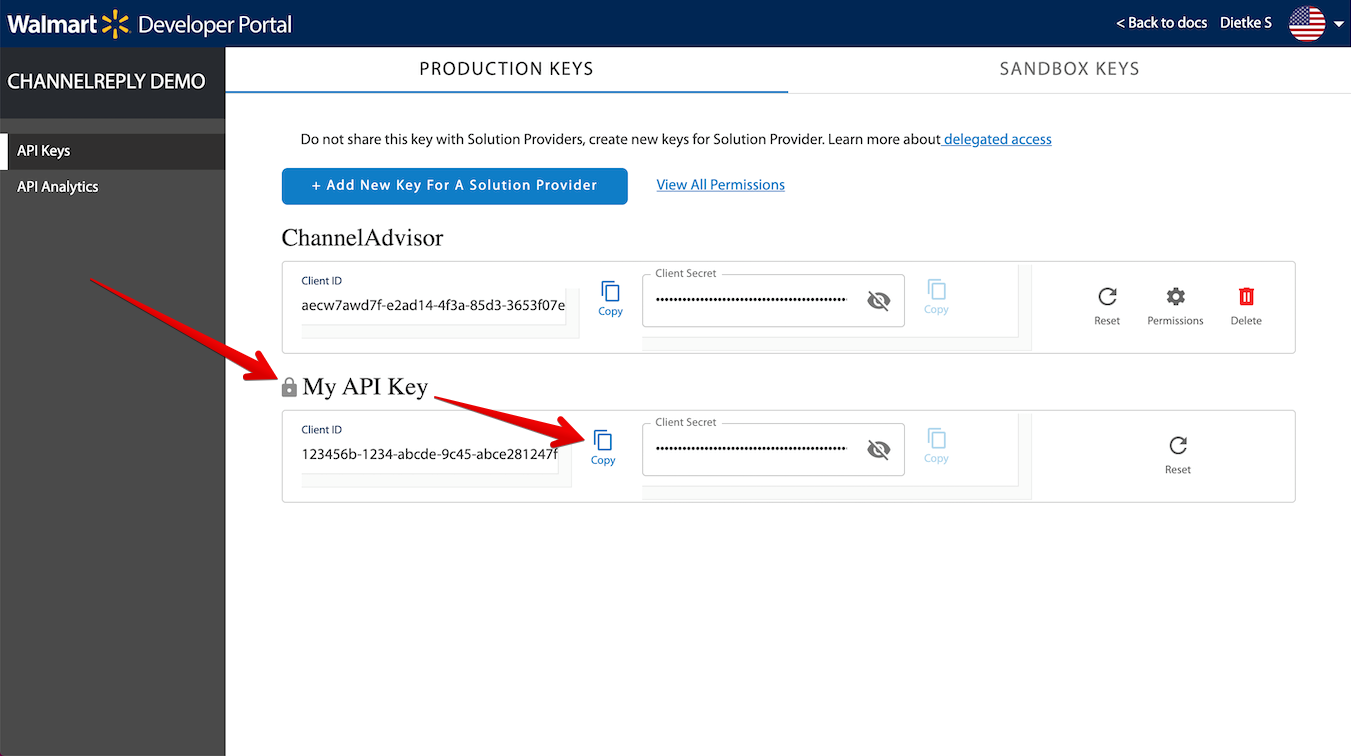
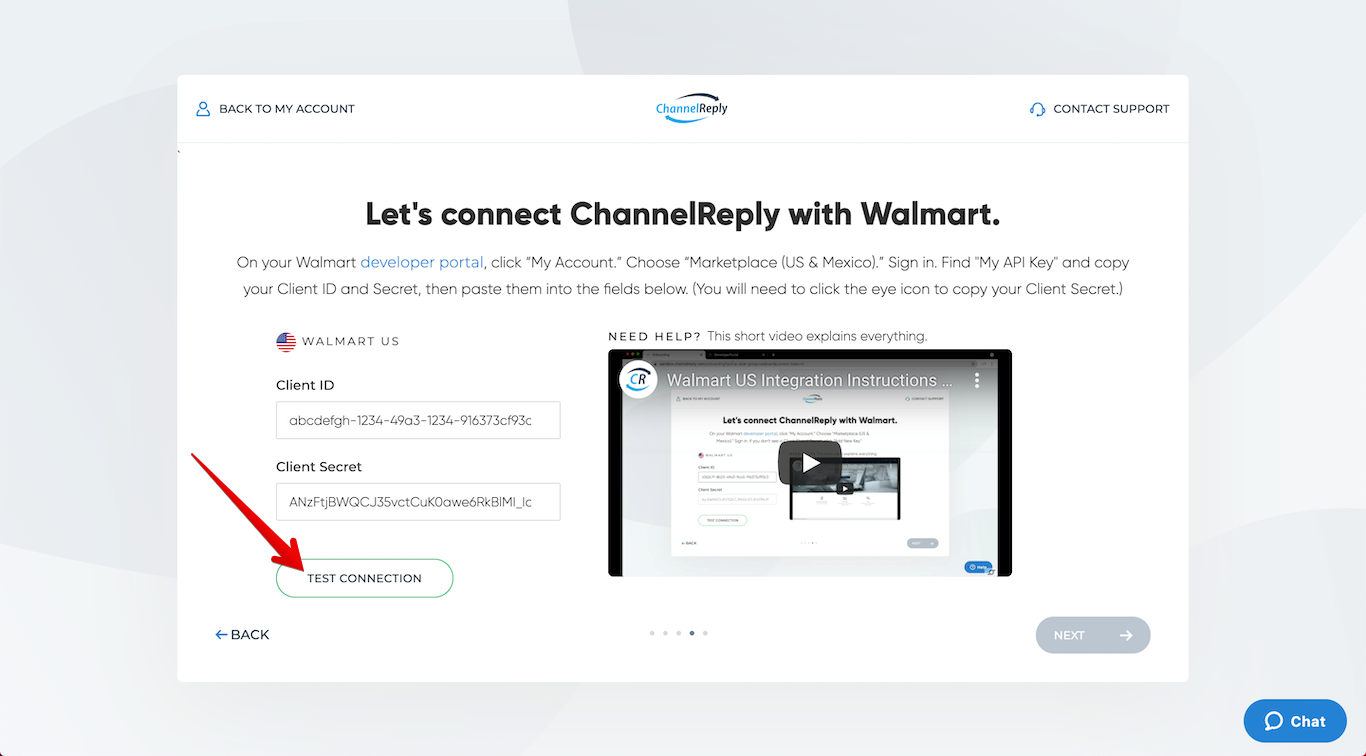
Log in to your account. Find “My API Key.” Click the Copy button next to “Client ID.”
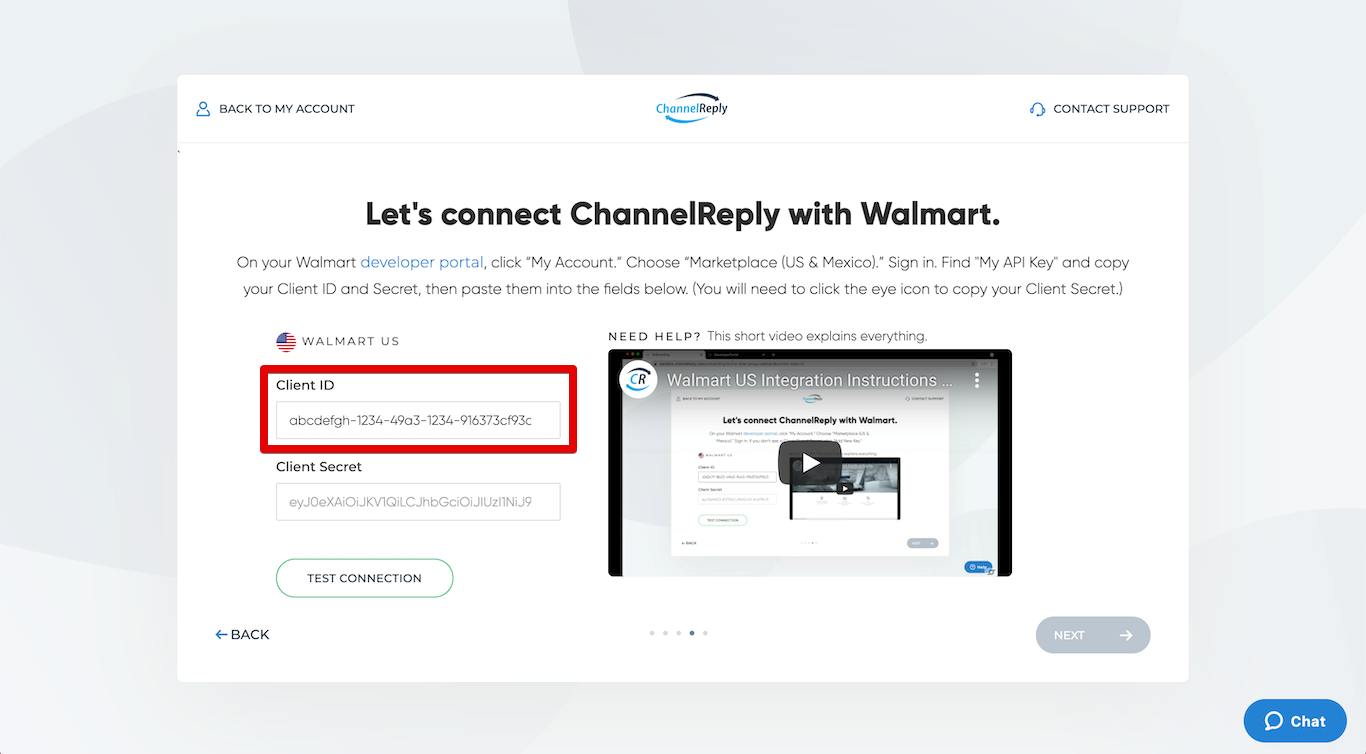
Then, return to ChannelReply and paste your ID into the Client ID field.
Next, return to Walmart and click the eye icon next to your Client Secret.
Click the secret’s Copy button.
Paste your secret into the Client Secret field in ChannelReply.
If you use Re:amaze, you will need to select a channel/brand here. Simply choose the best channel for this Walmart account from the dropdown. If the brand you want doesn’t appear, see “Managing Re:amaze Brands & Domains (Channels) in ChannelReply” for help.
Once the info in all fields is correct, click “Test Connection.”
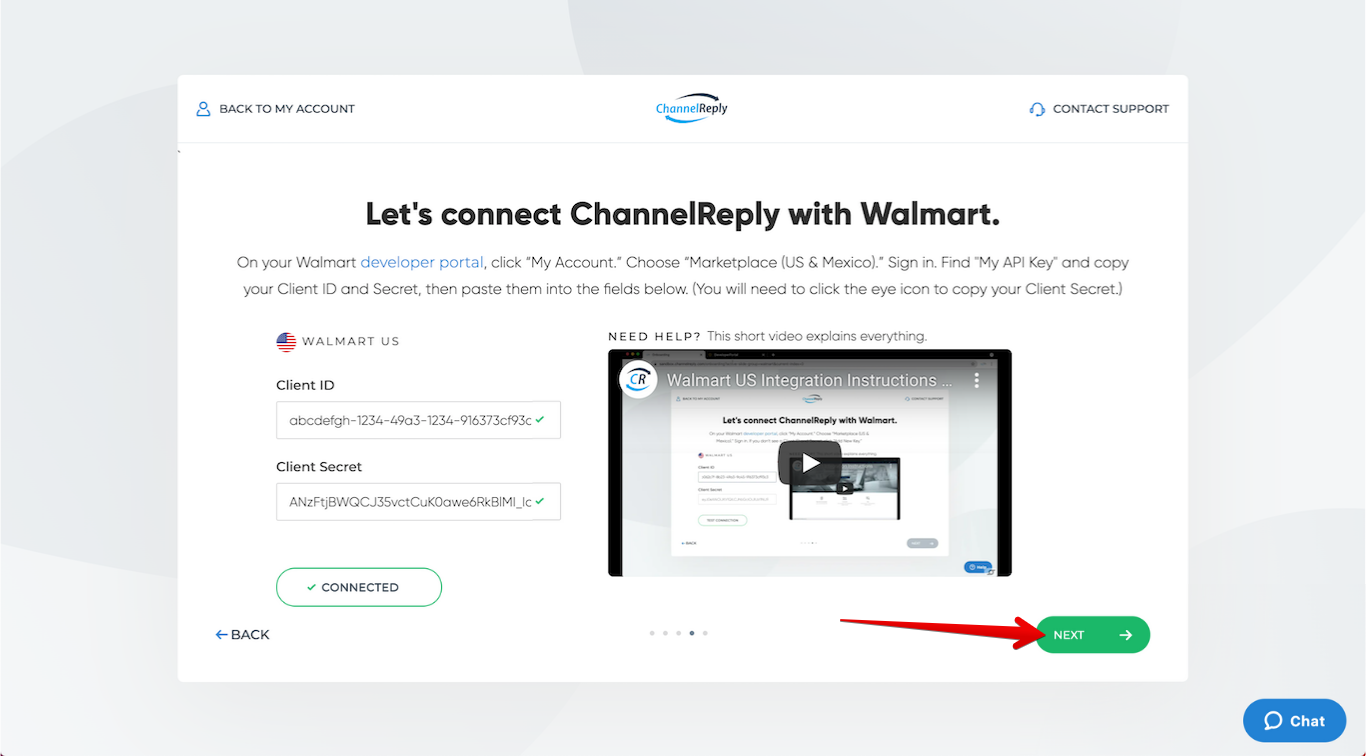
Green checkmarks should appear to show that the integration is successful. If it succeeds, click “NEXT” to continue, then skip to step 3.
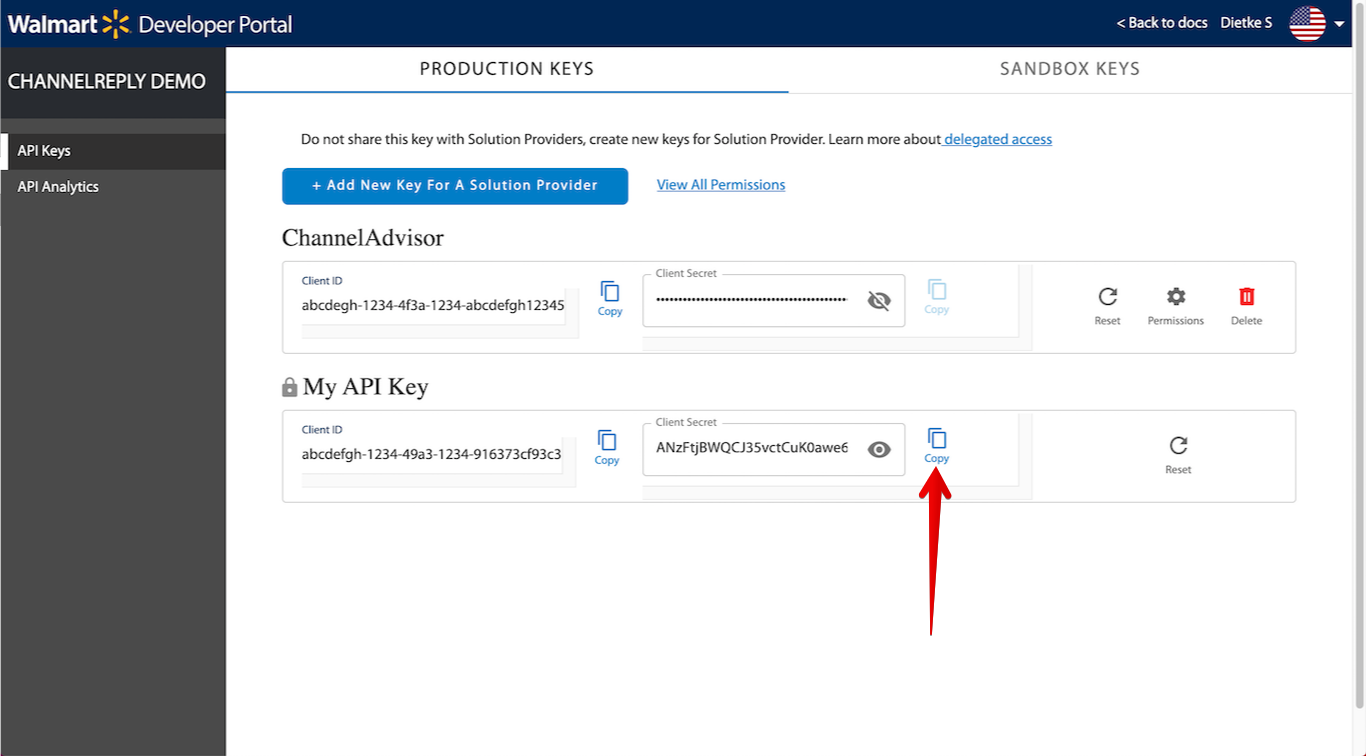
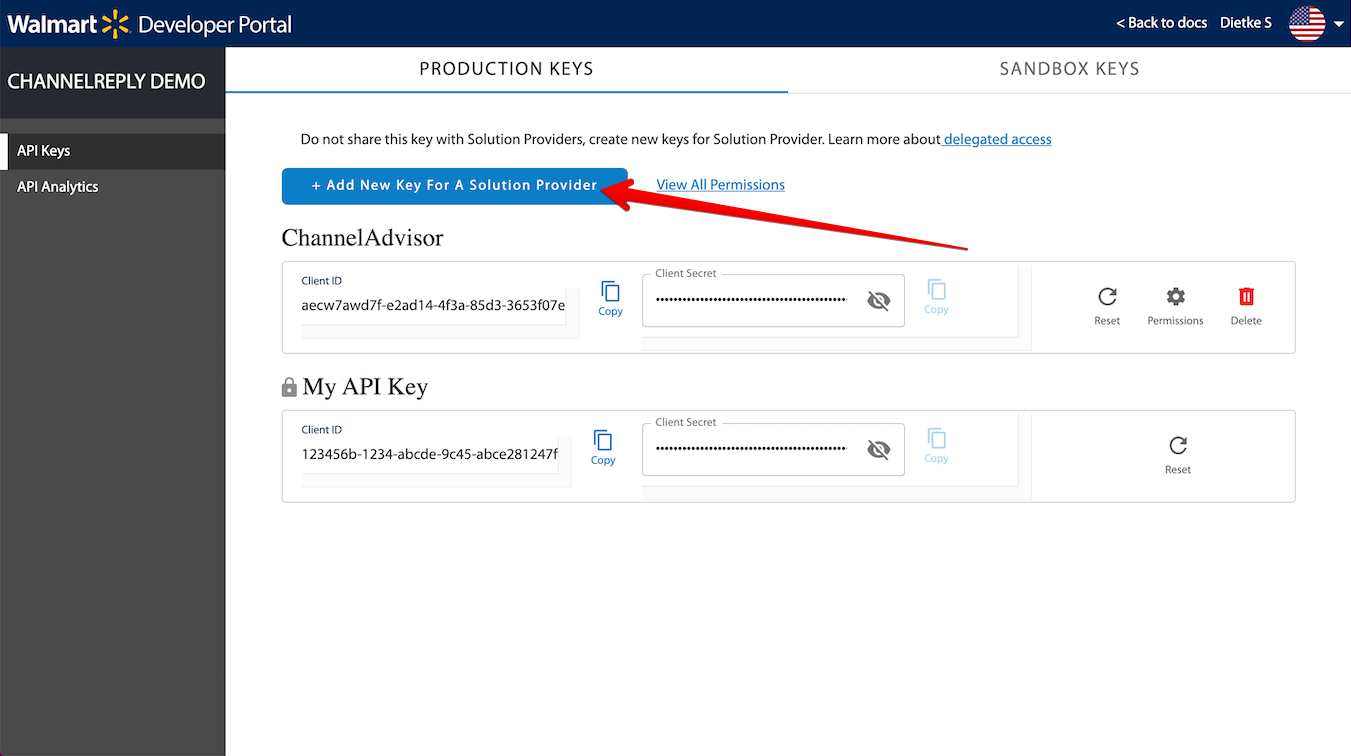
If it fails and you're sure you've entered your info correctly, you may be able to solve the issue by generating a unique set of keys for Onsite Support. (This will work for connecting ChannelReply even if you don't use Onsite as your helpdesk.)
In Walmart, click "+ Add New Key For A Solution Provider."
Select Onsite Support from the list of providers. Click "Next," then follow any prompts that appear to generate your new set of API keys.
Once the Onsite Support keys appear, copy them into the Client ID and Client Secret fields in ChannelReply. Click "TEST CONNECTION" again. Once you see a success notification, click "NEXT" to continue with setup.
3. Update Your Walmart Email Settings
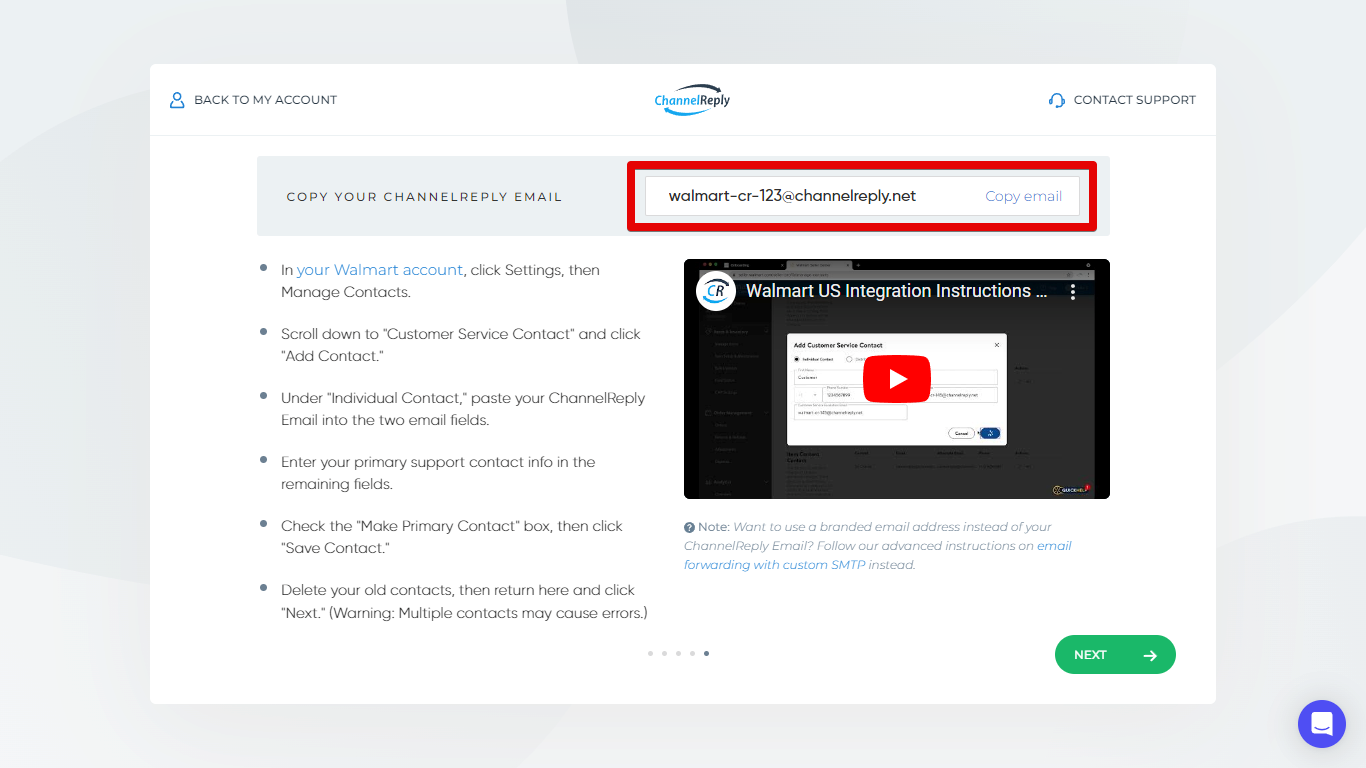
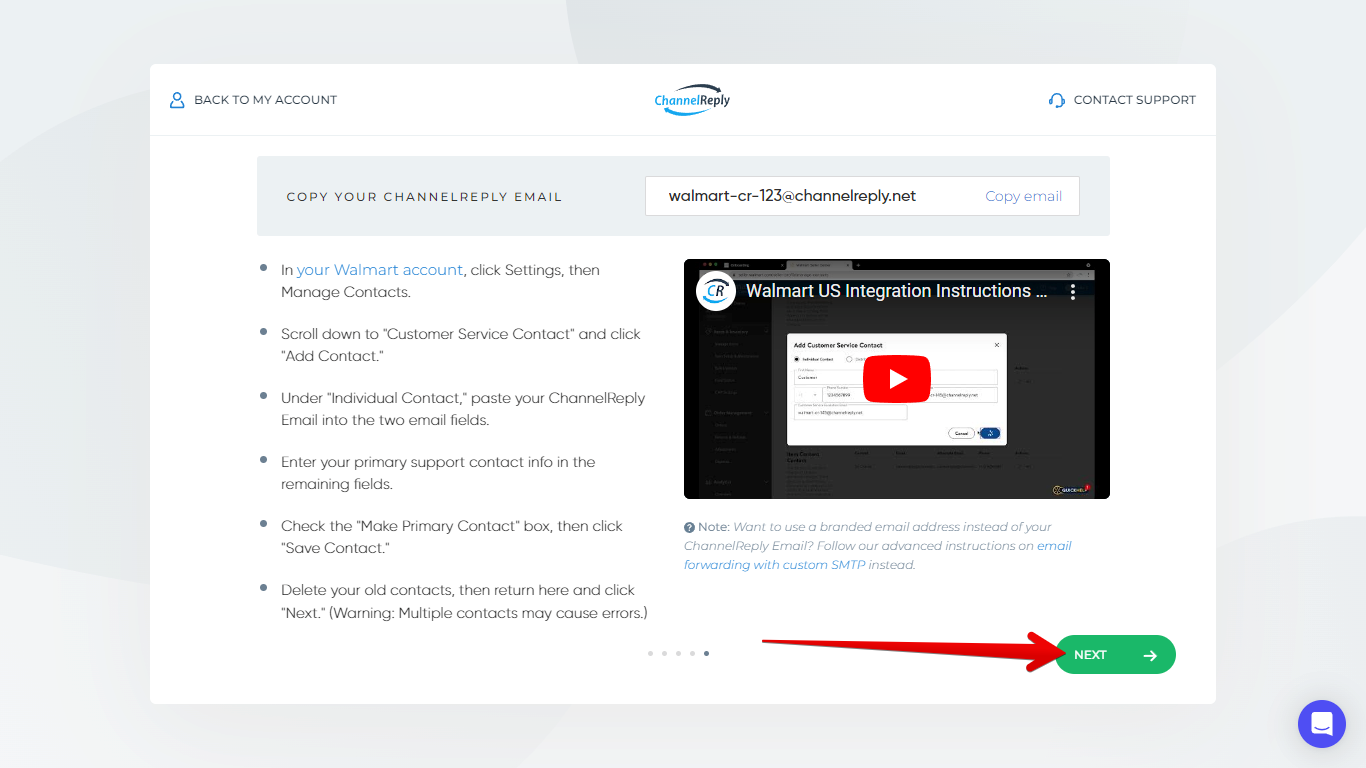
You’ll see your ChannelReply Email at the top of the new screen.
You can edit it if you’d like. Any unique email address that ends in @channelreply.net will work. After editing, click anywhere outside the ChannelReply Email field to save your changes.
You now have a choice:
- Use your ChannelReply Email for Walmart support to keep setup fast and easy. Just note that in rare cases, customers may see your @channelreply.net address. Continue reading this article below to finish setup.
- Use a branded Gmail or iCloud Mail address instead. This is more complicated, but it will make sure you always look professional. Switch to reading our guide to email forwarding with custom SMTP if you prefer this option.
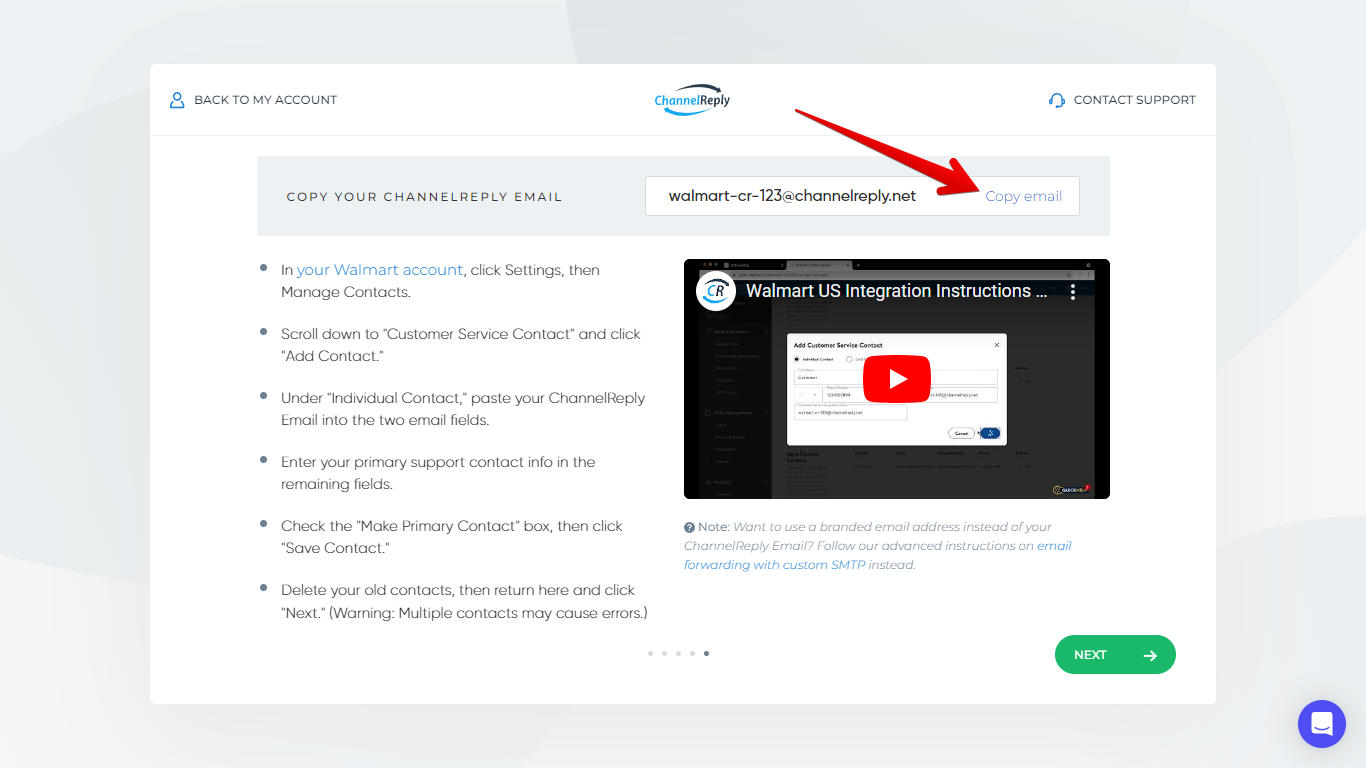
If you've decided on option 1 (fast and easy), let's continue. Click “Copy email.”
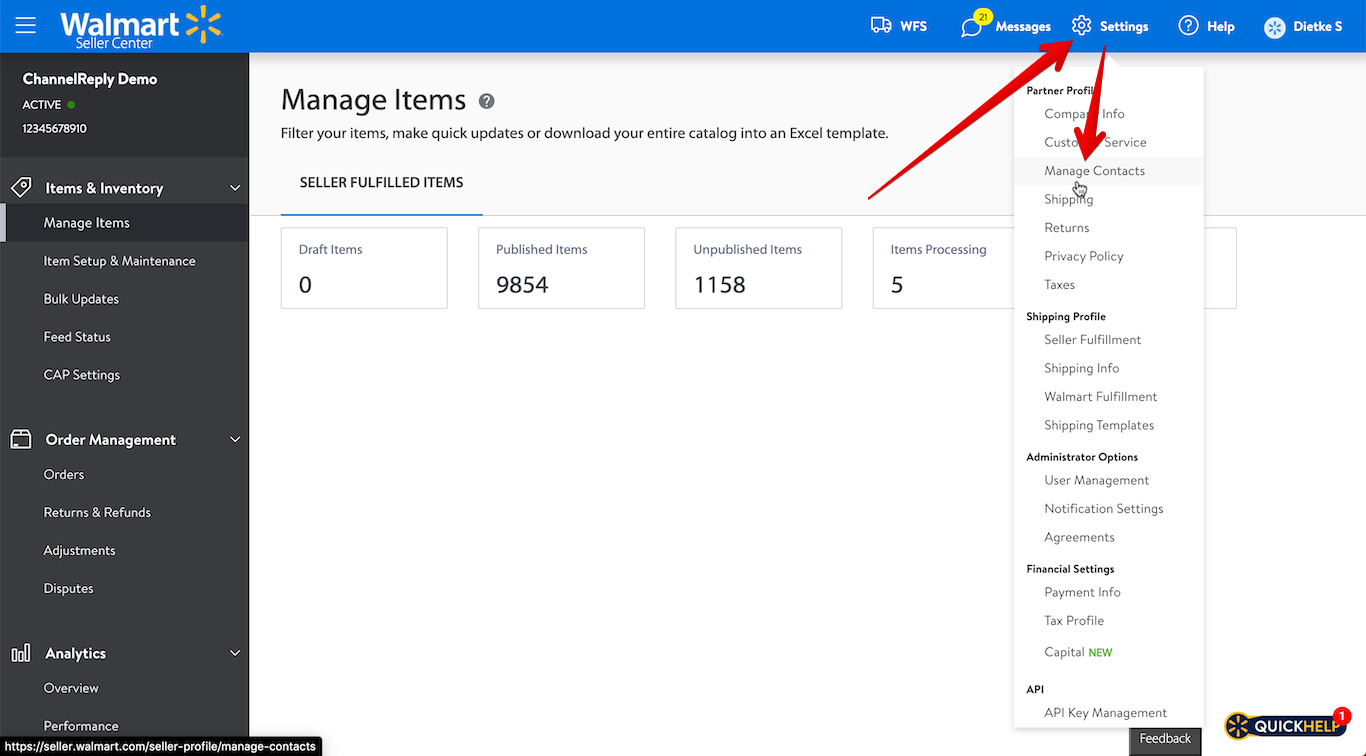
Next, sign in to your Walmart Seller Center account. Then click “Settings” and choose “Manage Contacts.”
Scroll down to “Customer Service Contact” and click “Add Contact.”
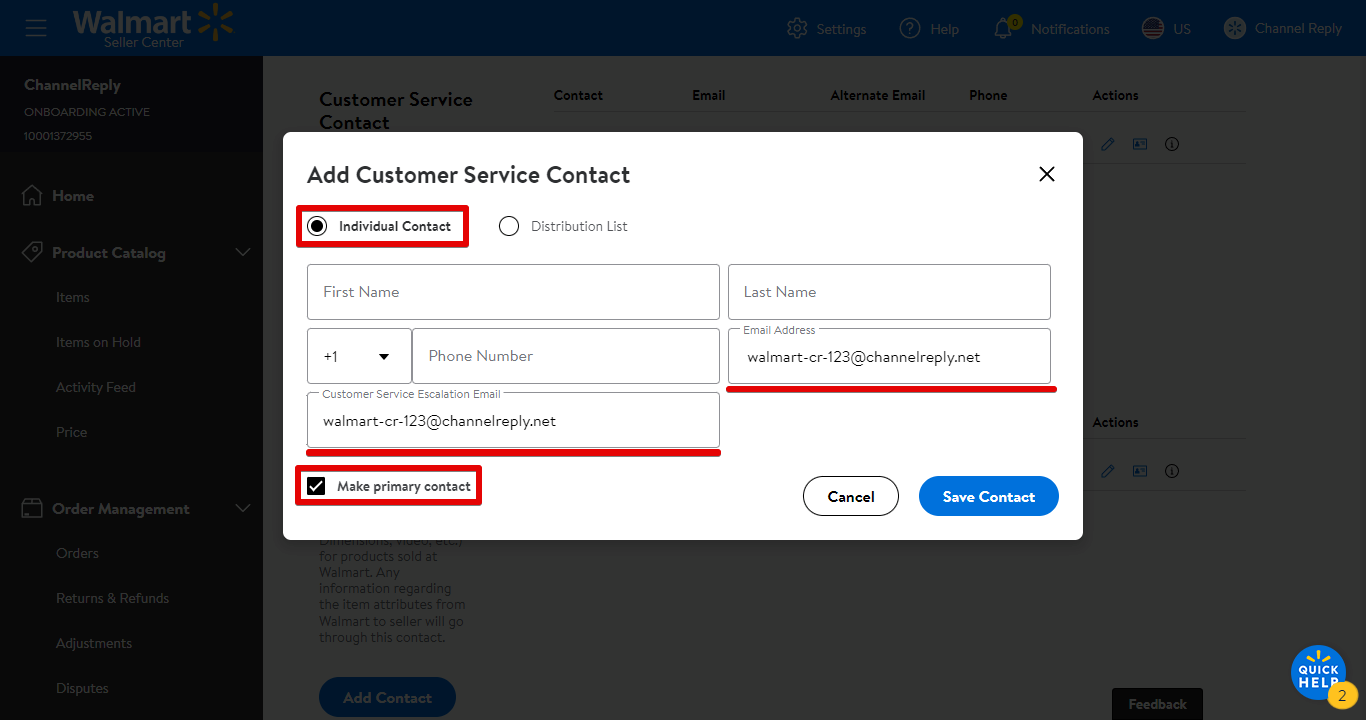
Make sure “Individual Contact” is selected. (“Distribution List” does not work with ChannelReply.) Check the "Make primary contact" box. Then paste your ChannelReply Email into the “Email Address” and “Customer Service Escalation Email” fields.
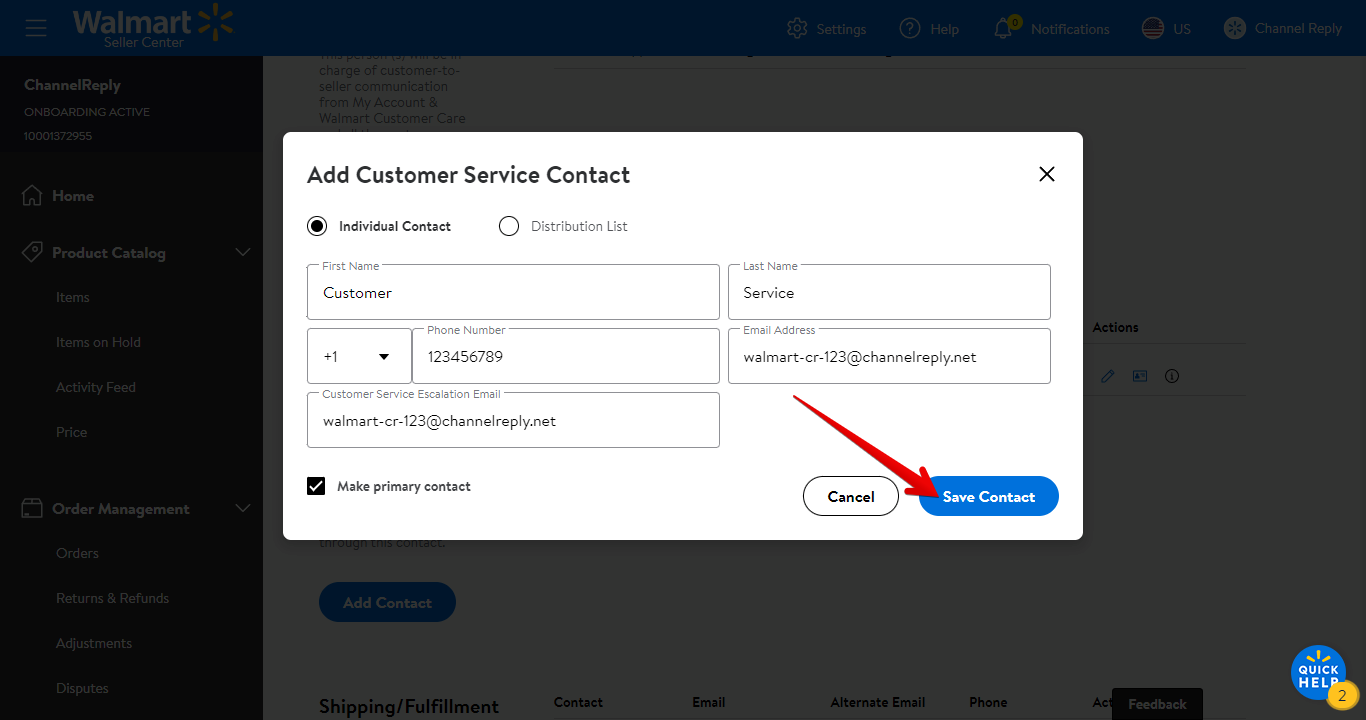
Fill in the remaining fields with your main customer service contact info. This should be your only customer service contact for Walmart, and at the very least will be your primary contact. So, make sure you enter your best phone number!
Once done, click “Save Contact.”
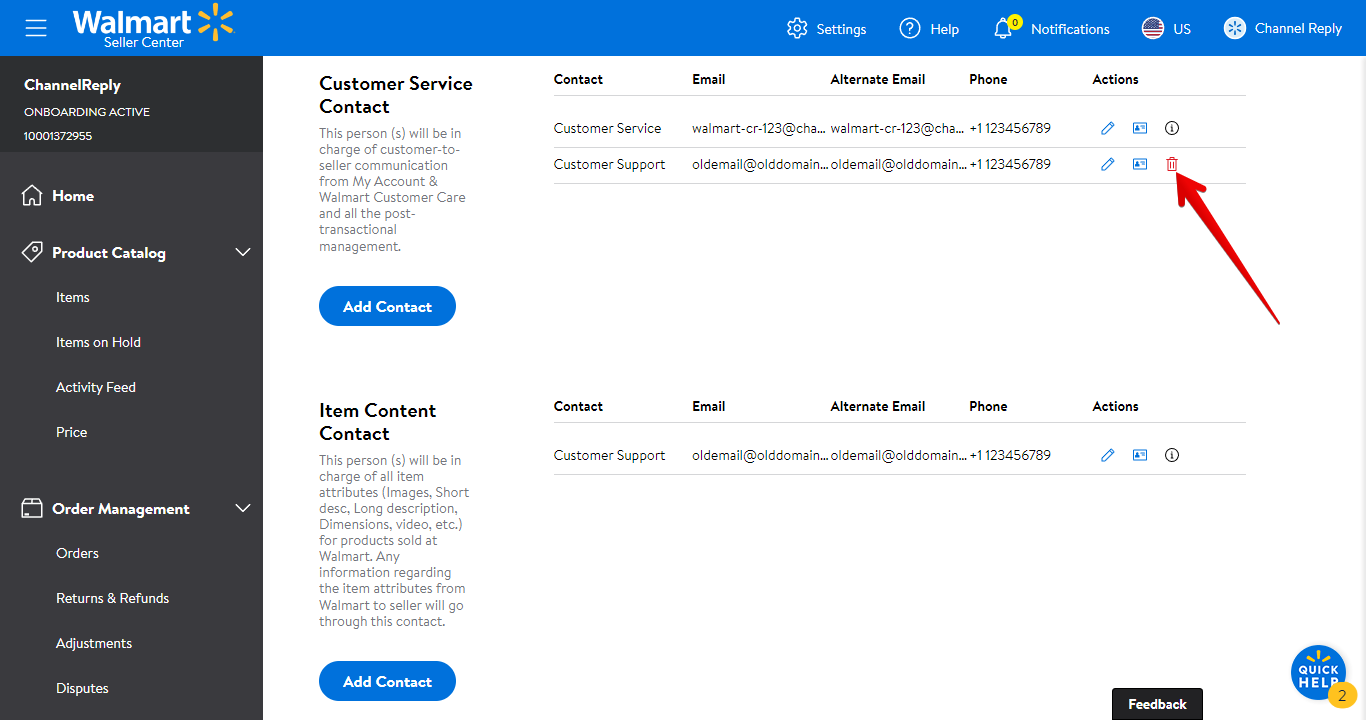
Next, we recommend deleting all your other customer service contacts. This will ensure data and messages are delivered reliably.
To delete a contact, click the trash can on the right.
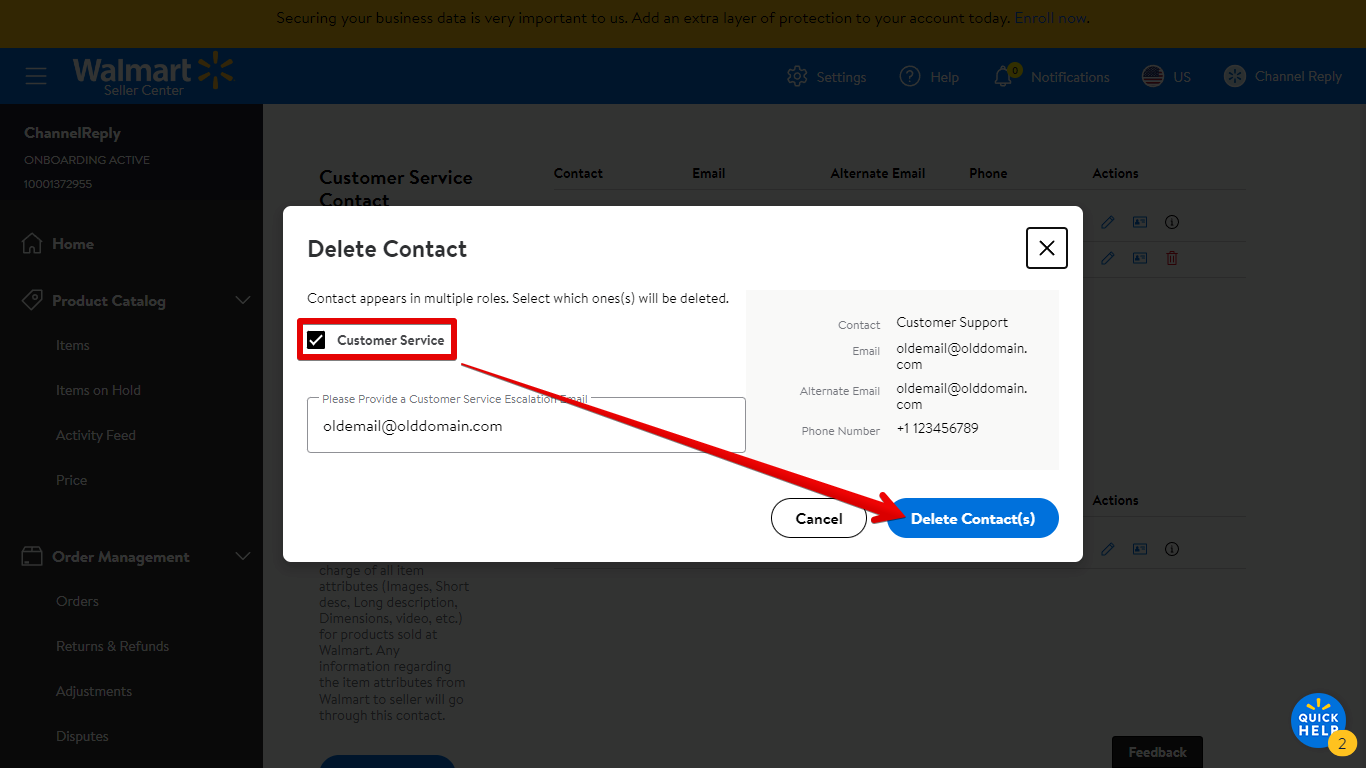
On the confirmation screen, make sure “Customer Service” is checked, then click “Delete Contact(s).”
When you’ve finished working with your email settings, return to ChannelReply and click “Next.”
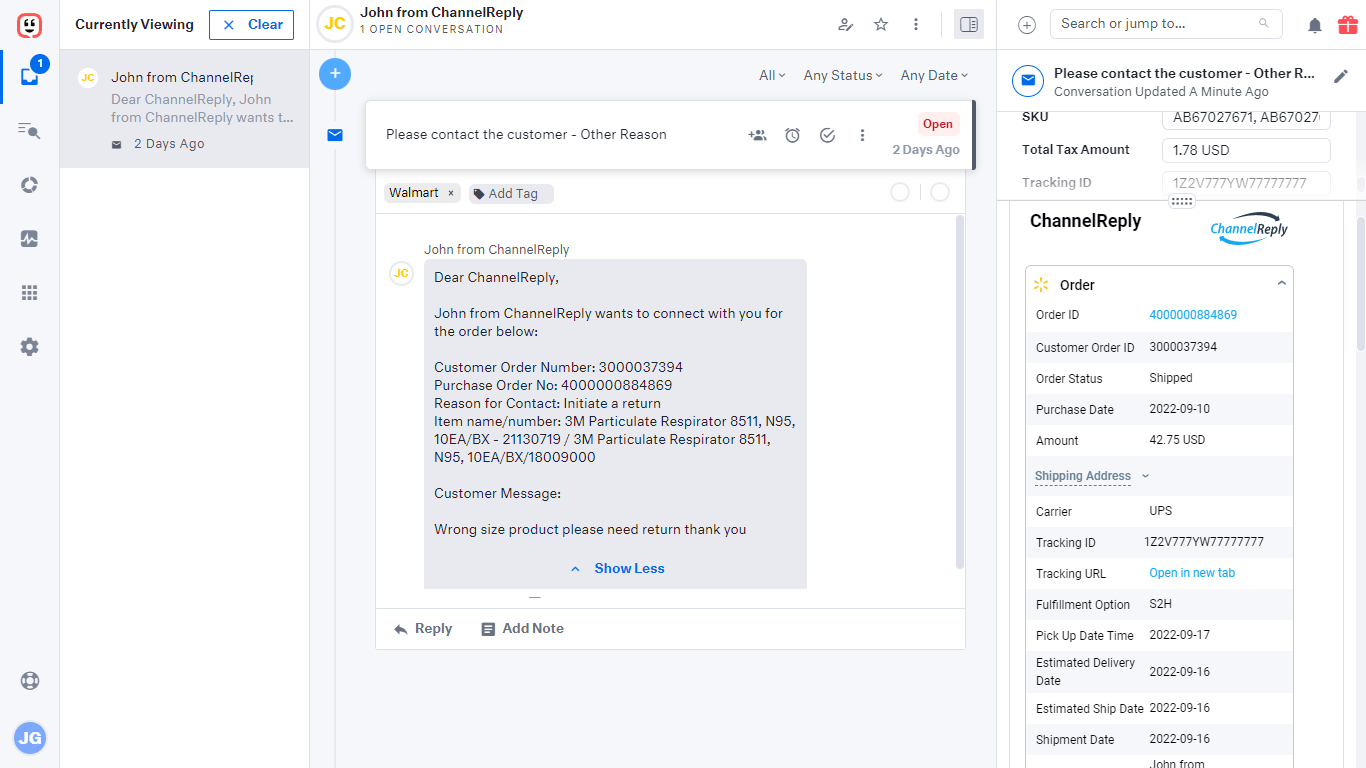
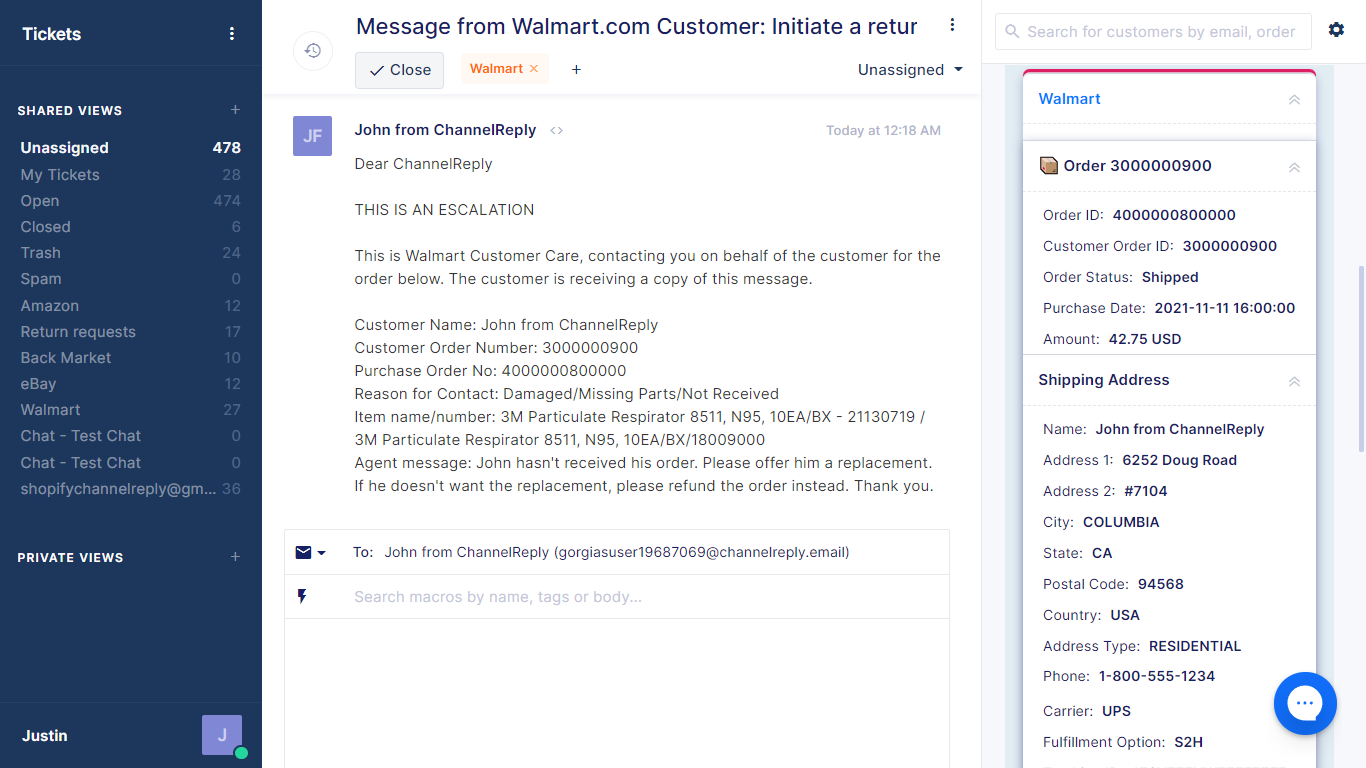
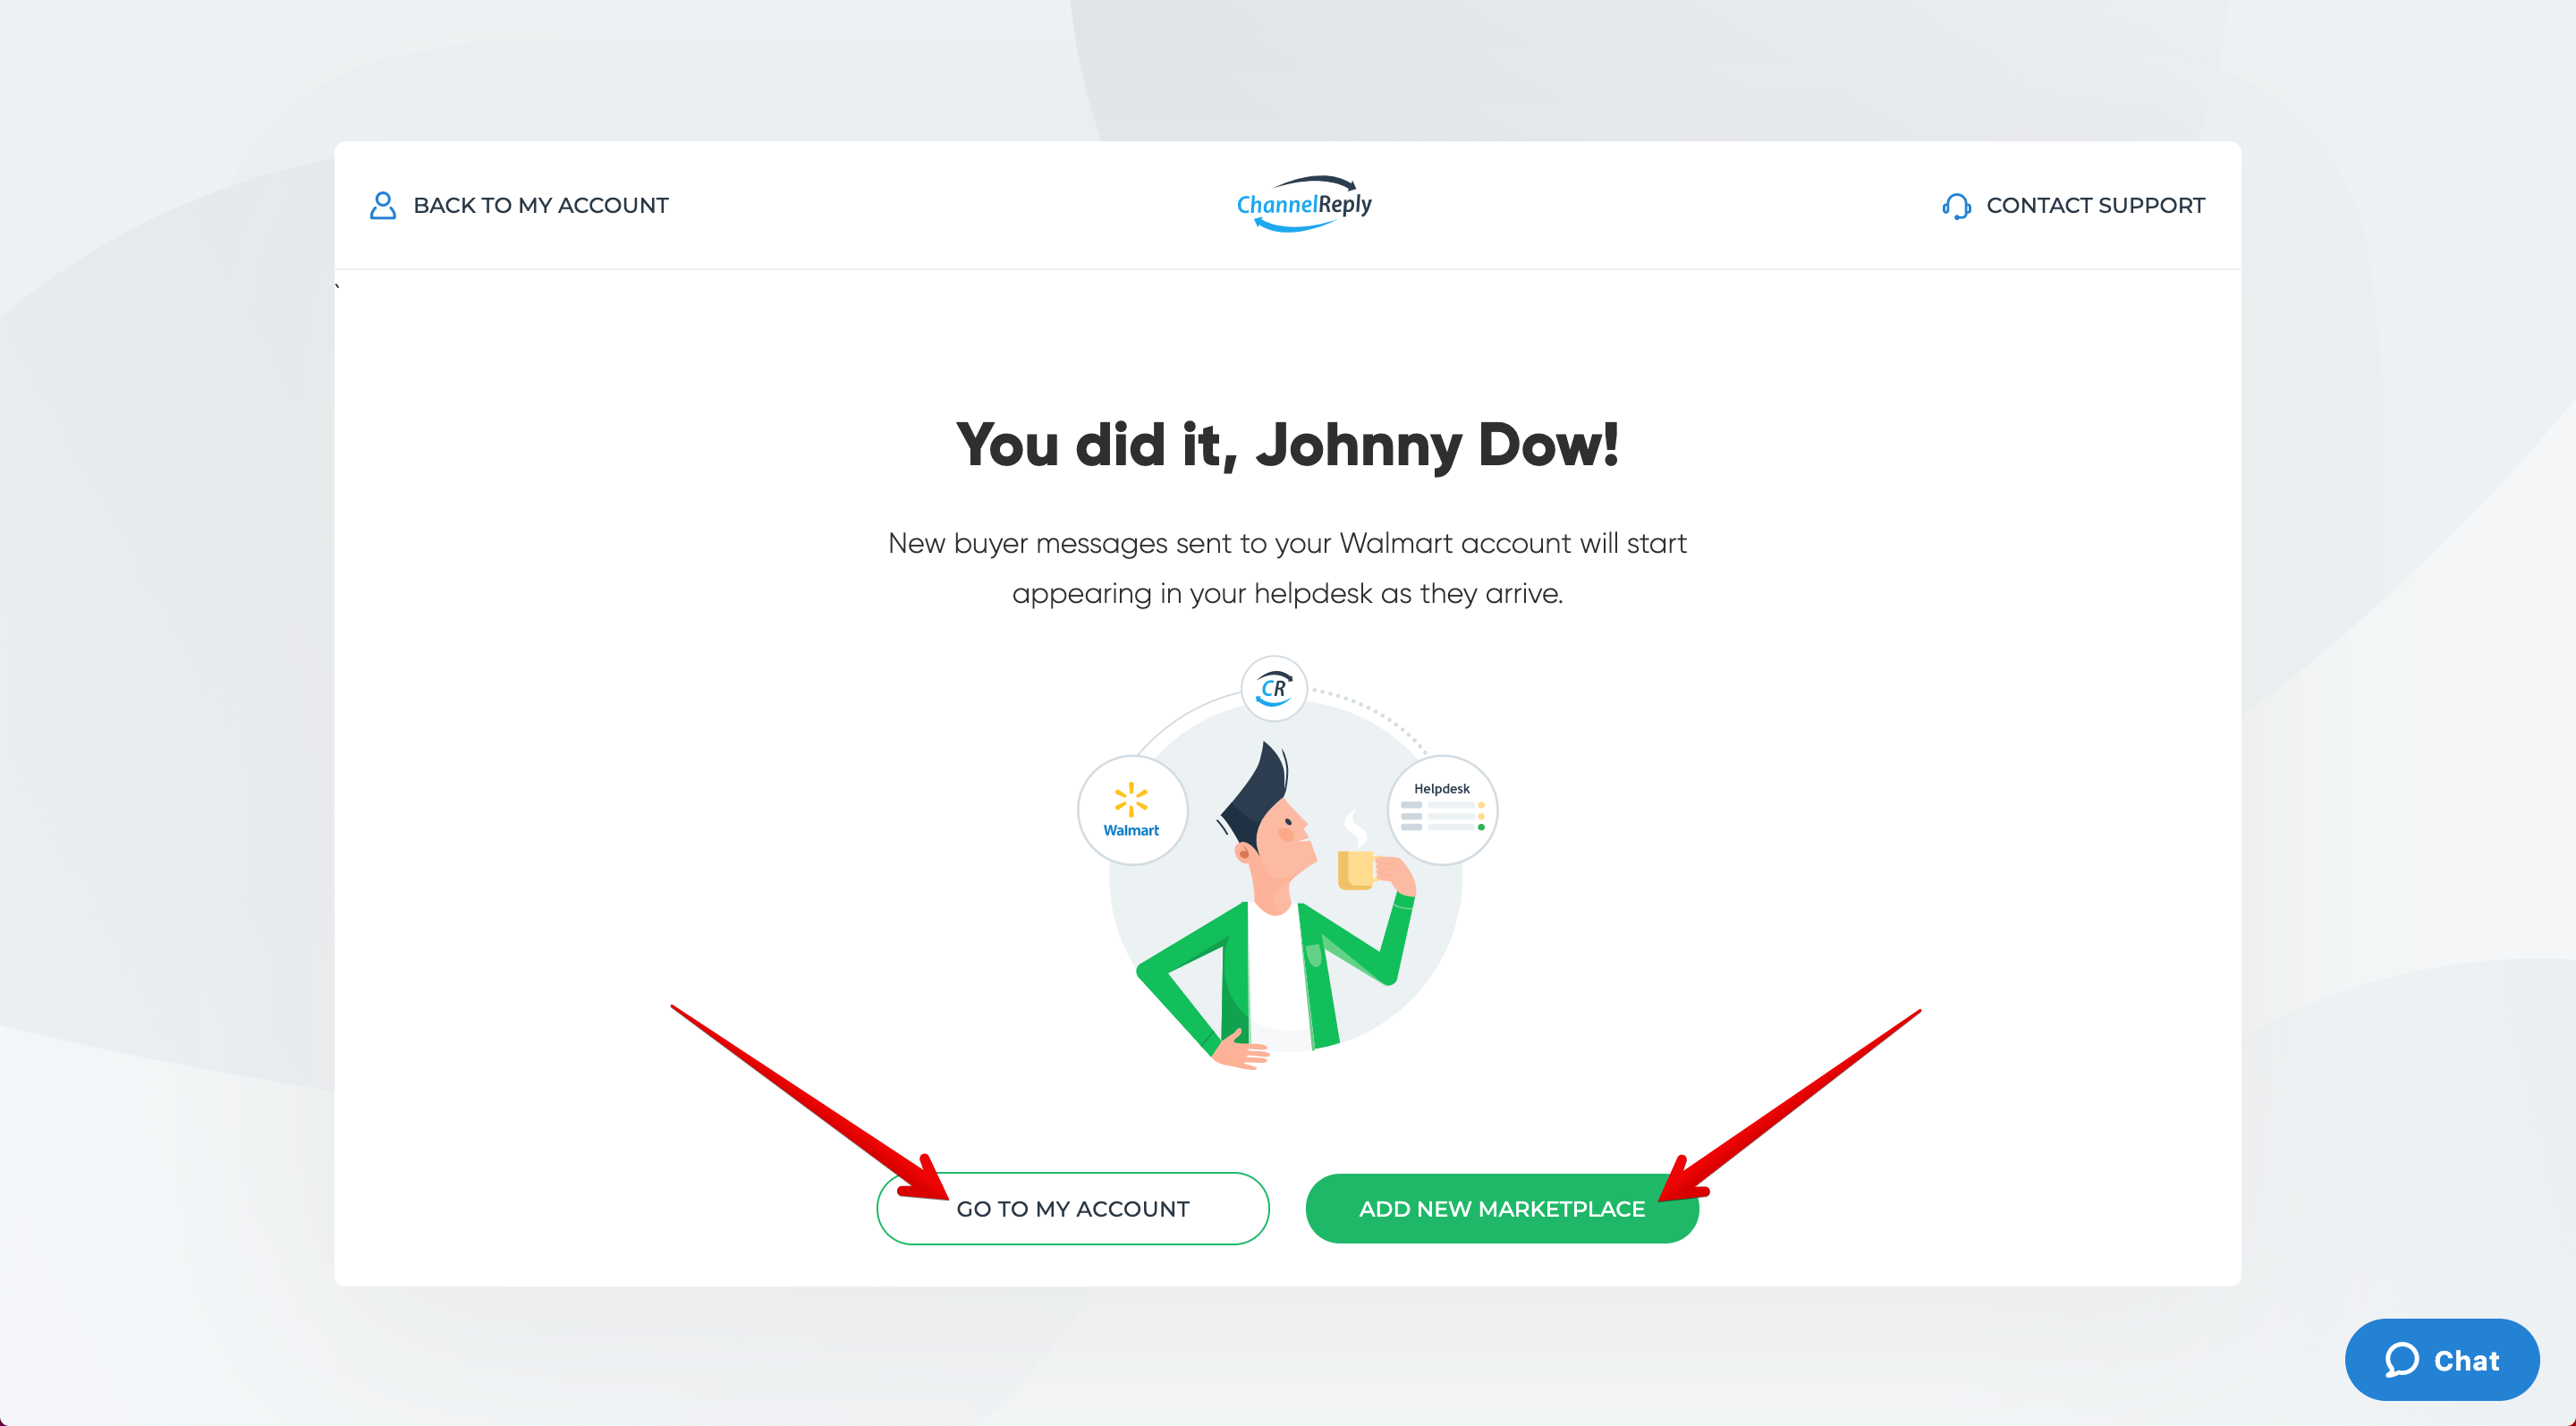
Congratulations! You now have a successful Walmart integration, and any new messages you receive in Walmart will appear in your helpdesk. You will also see data beside each new message that's related to an order, as shown below.
Above: A Walmart message in Kustomer with order data in the ChannelReply app on the right. ChannelReply displays order info the same way in Zendesk, Freshdesk, Re:amaze, Zoho Desk and Onsite Support.
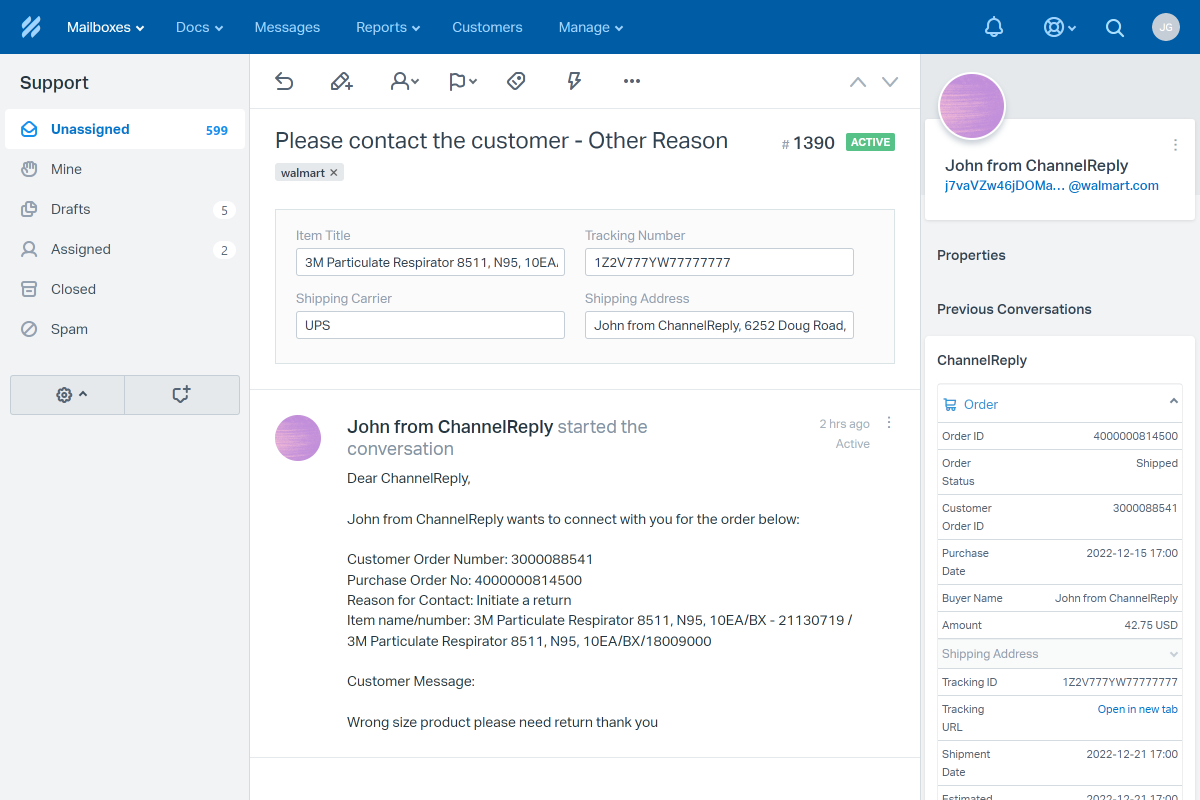
Below: A Walmart escalation notification with order data in Gorgias.
Below: A Walmart message with order data and custom fields in Help Scout.
Click “GO TO MY ACCOUNT” to exit setup, or hit “ADD NEW MARKETPLACE” to integrate other Walmart (Canada instructions), eBay, Amazon, Shopify, Etsy, Back Market or Newegg accounts.
4. Configure Additional Settings (Optional)
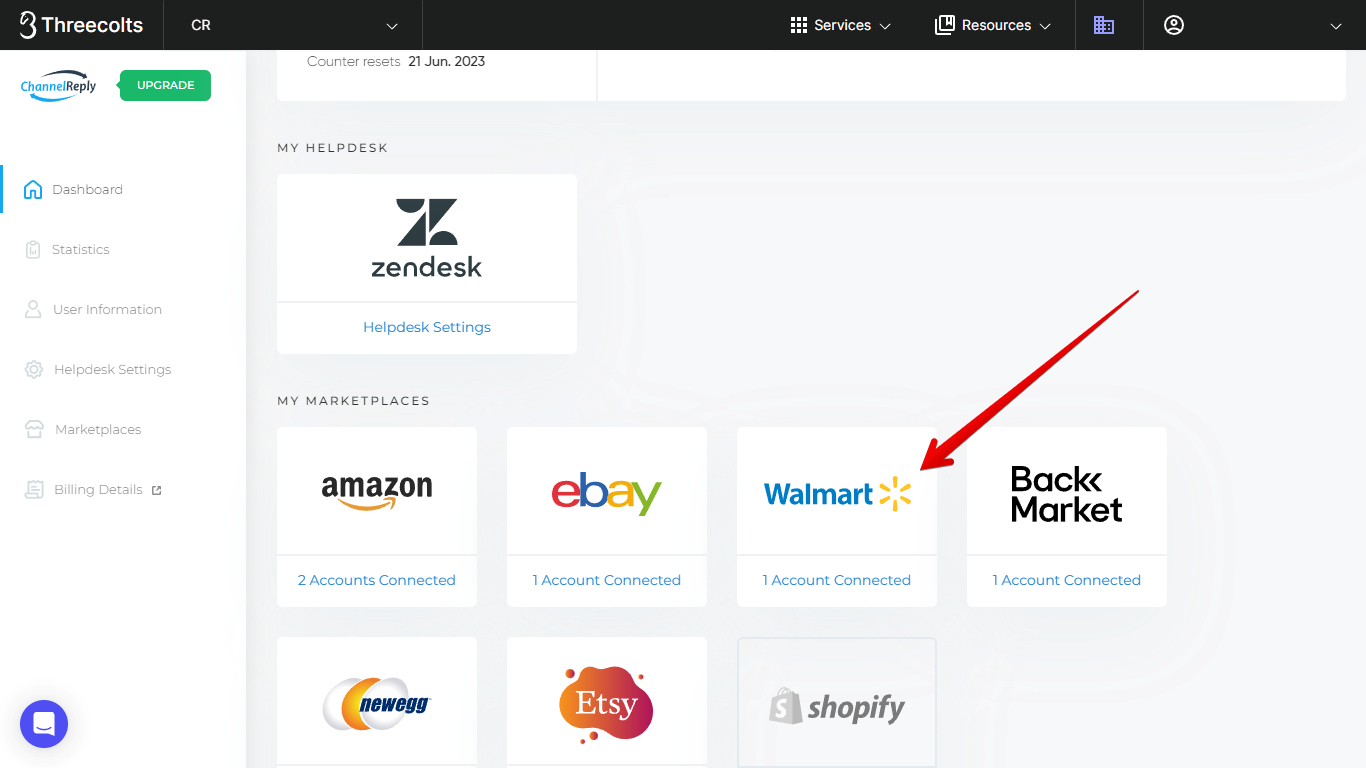
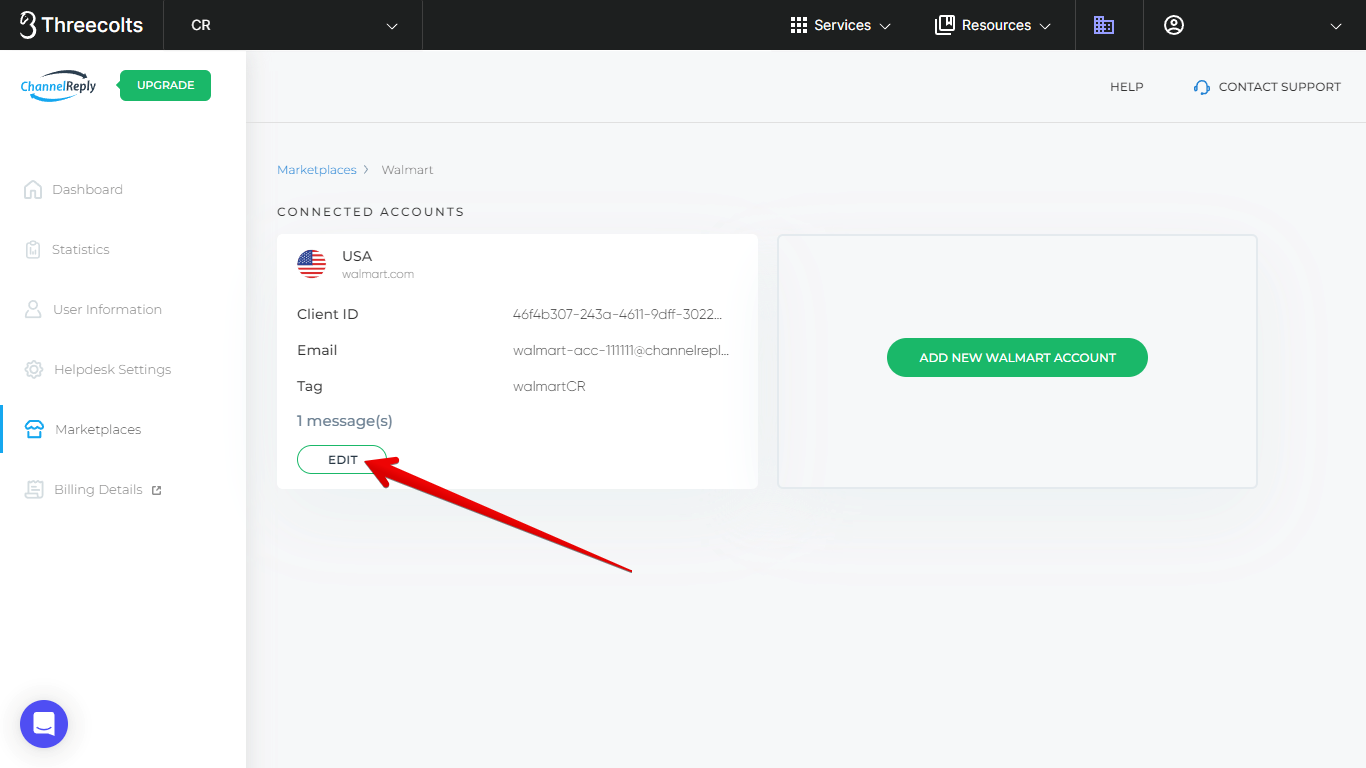
Visit your ChannelReply dashboard and click on the Walmart tile.
You will now see all your connected Walmart accounts. Click "EDIT" under the one you would like to manage.
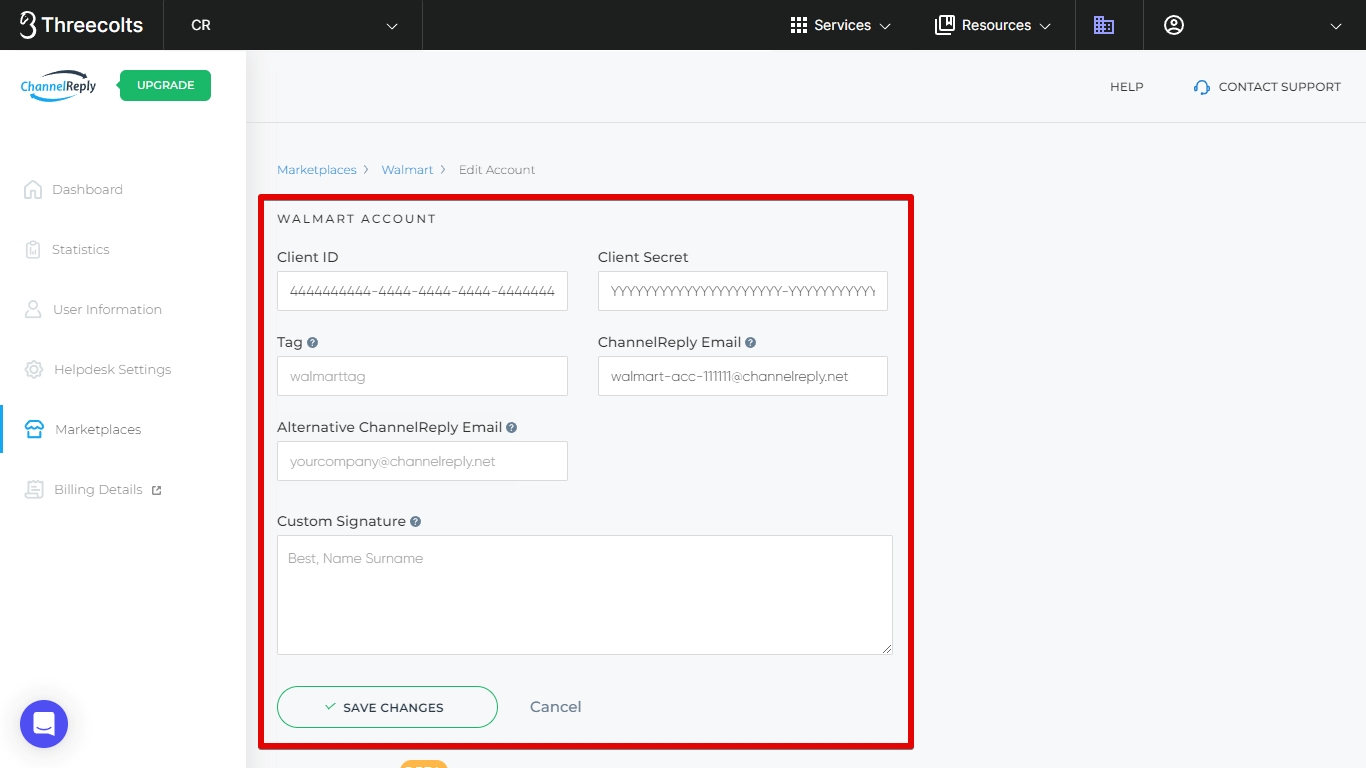
You will then see all your advanced options.
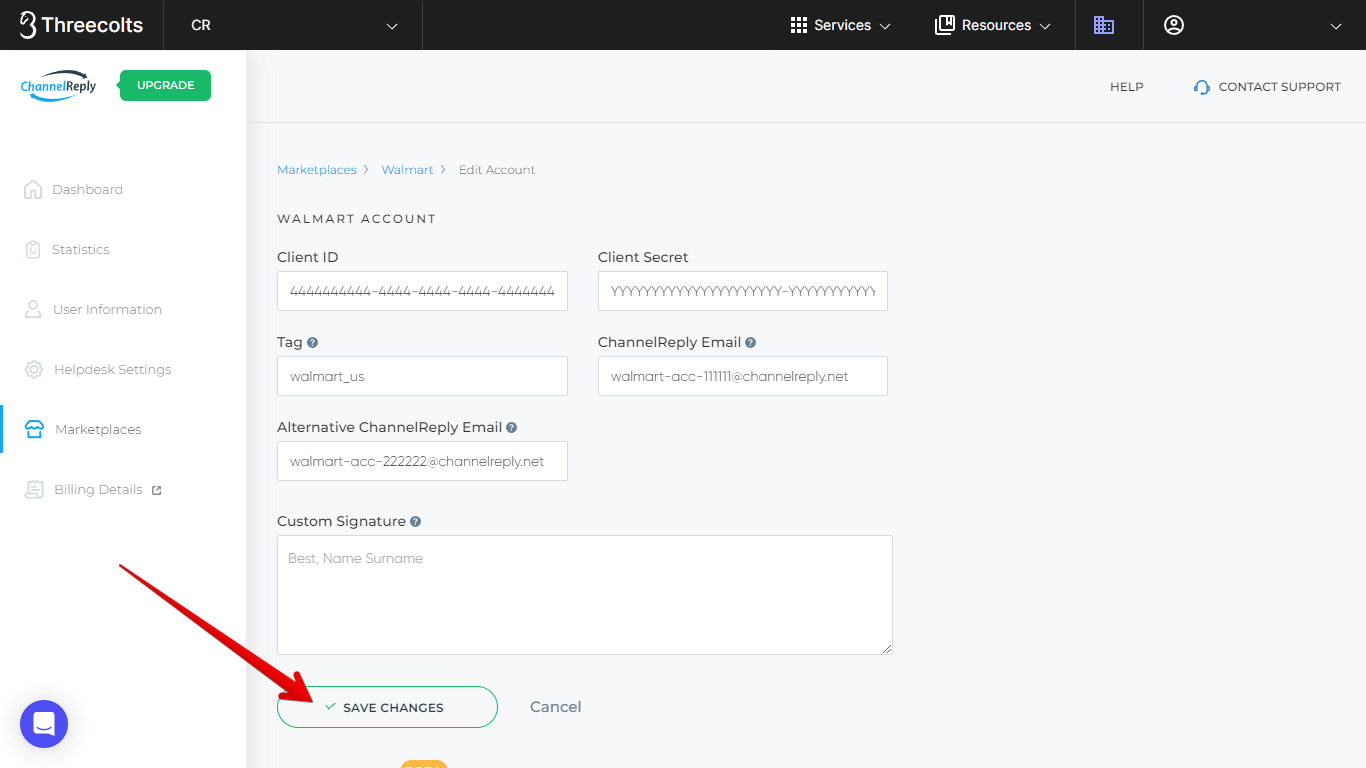
Walmart Account
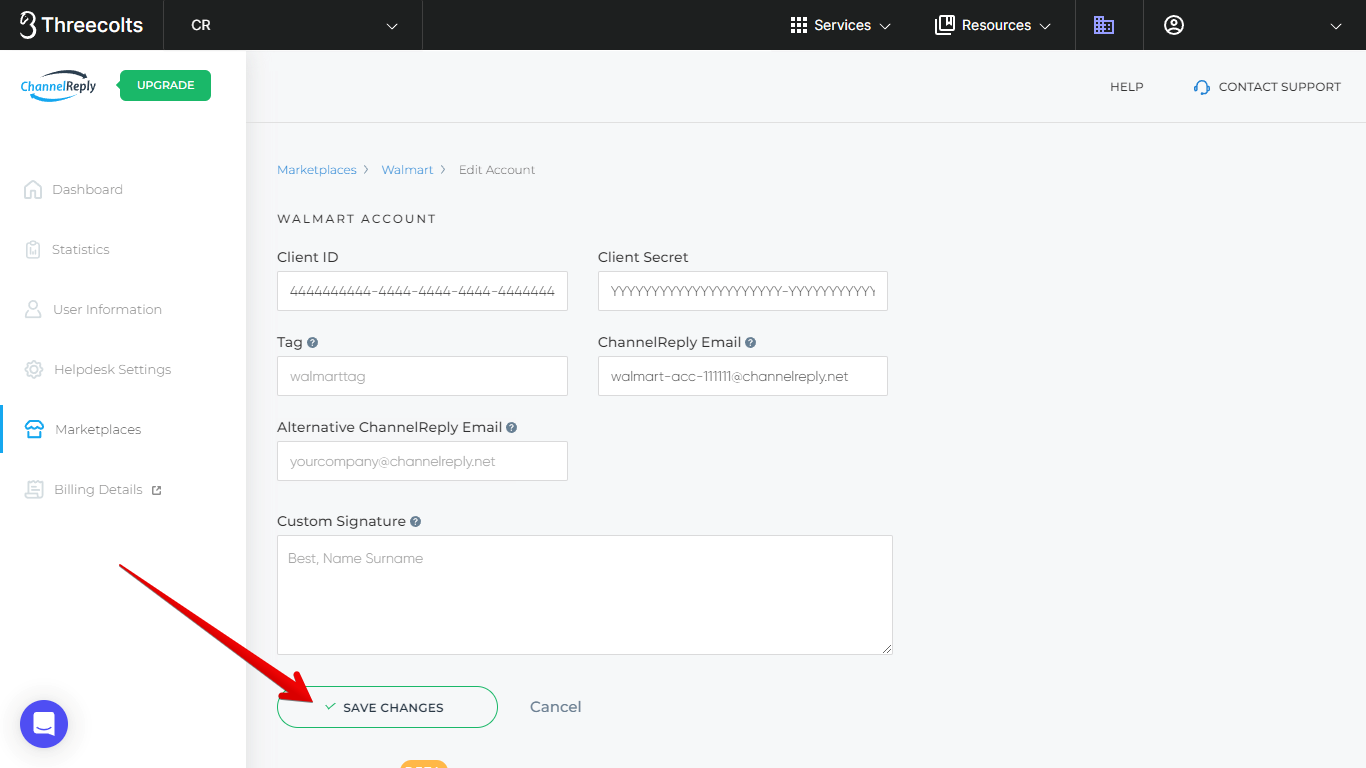
This section includes your API credentials, tag, ChannelReply Email, and Alternative ChannelReply Email. The "SAVE CHANGES" button in this section will save all changes to these fields.
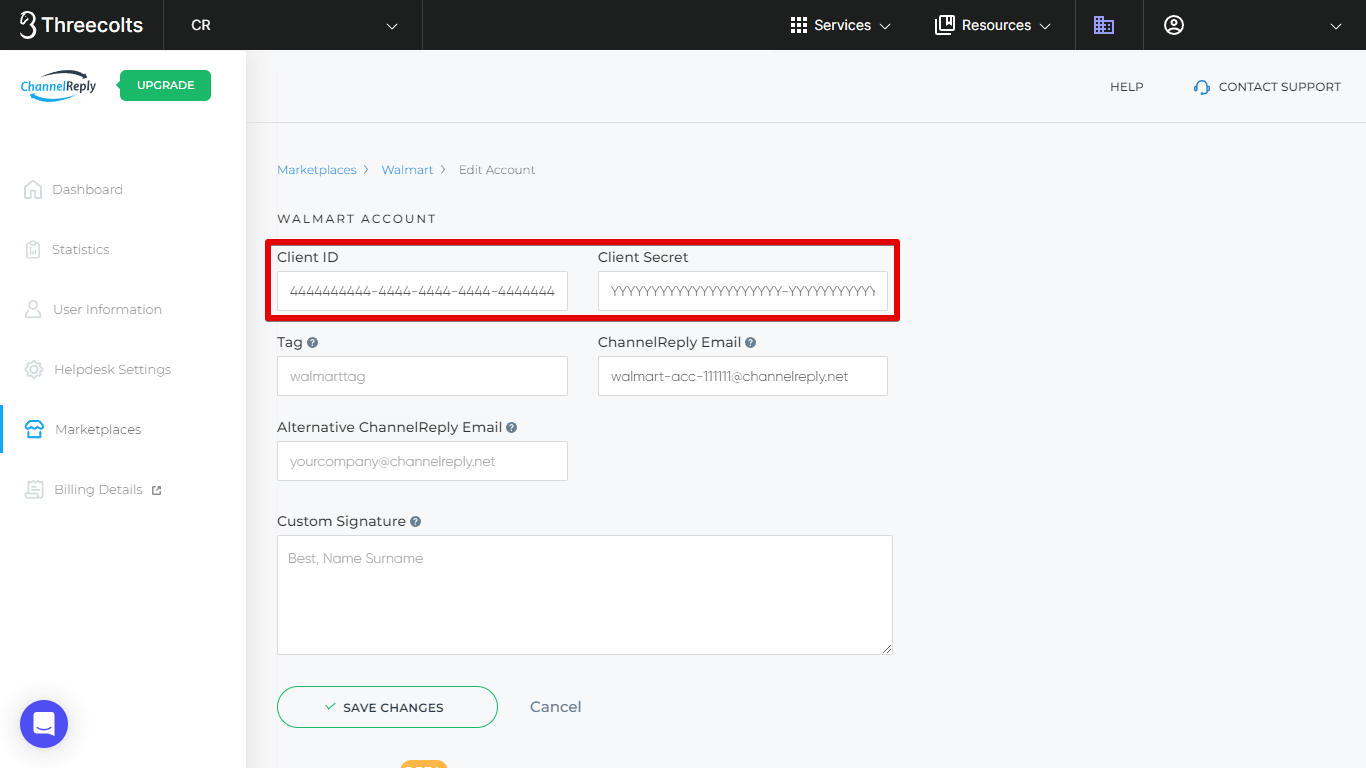
API Credentials (Client ID & Client Secret)
Most companies never need to update these. However, if you reset your credentials on Walmart, you will need to enter and save the new credentials here in order to repair your integration.
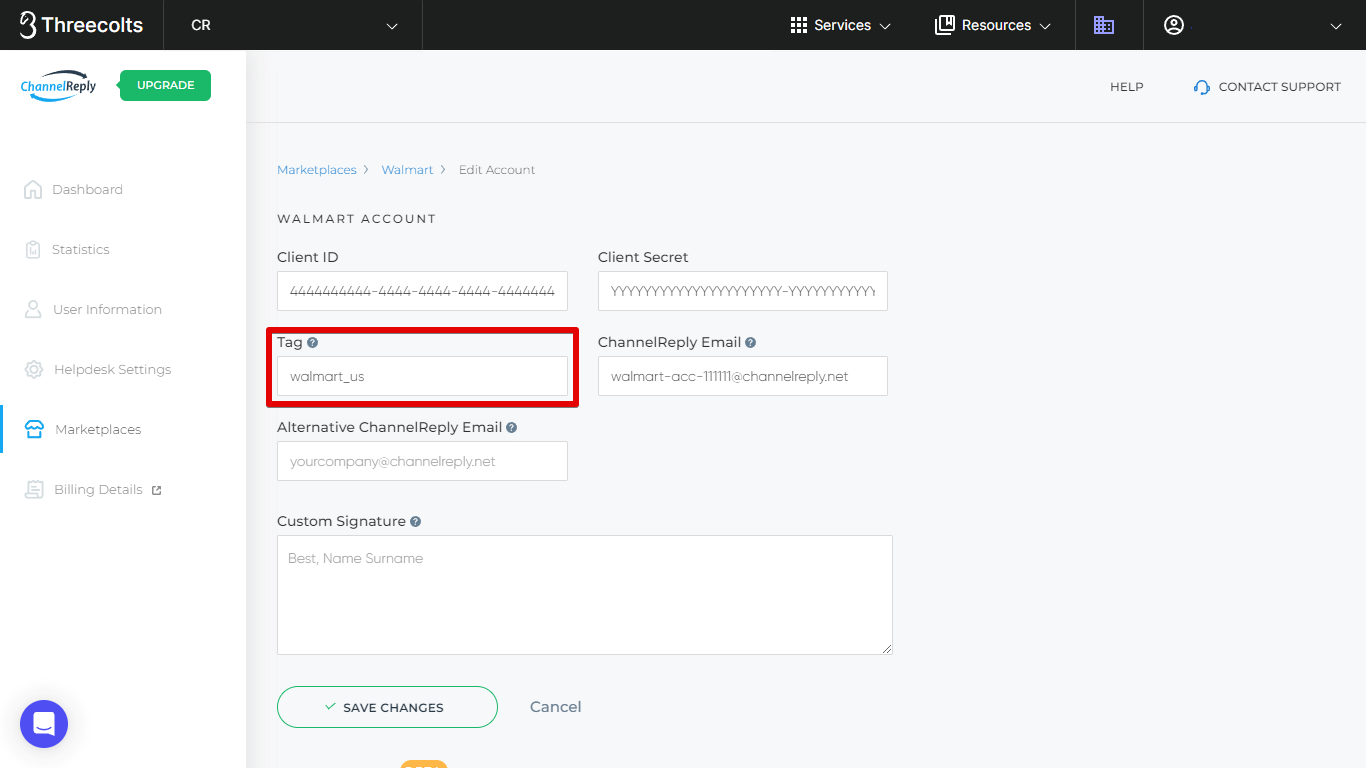
Tag
Tags are strongly recommended for all ChannelReply users. They identify which marketplace and account each message comes from. They are also critical for almost all advanced support tools.
Create a unique tag for this particular Walmart account by typing it into the Tag field. Since we only have one Walmart US account, we'll simply enter "walmart_us" here.
Note that if you use spaces in your tag, each word will become a separate tag in your helpdesk. Use underscores or dashes (e.g. walmart_mybrand or walmart-us) if you want to visually separate multiple words.
To learn more about tags and how you can use them, see our guide to ChannelReply tags.
Remember to save your changes!
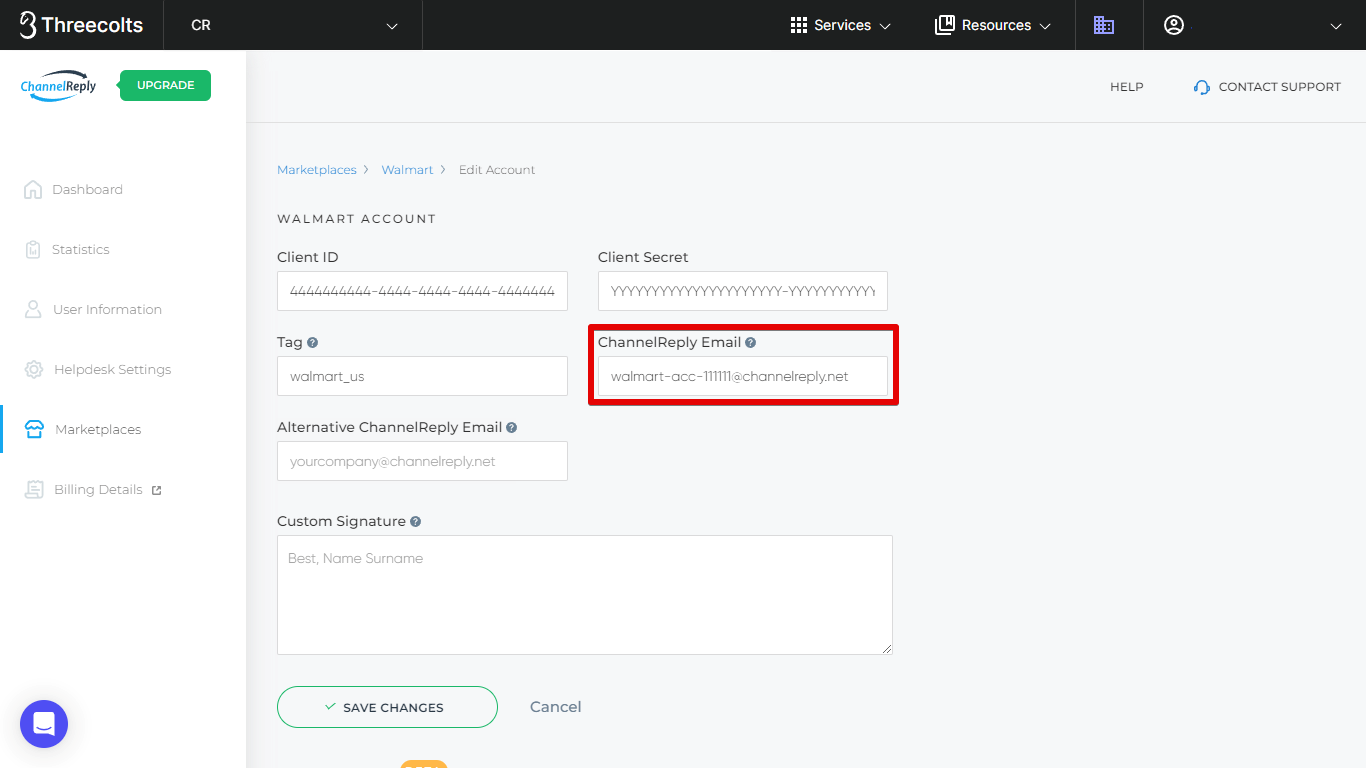
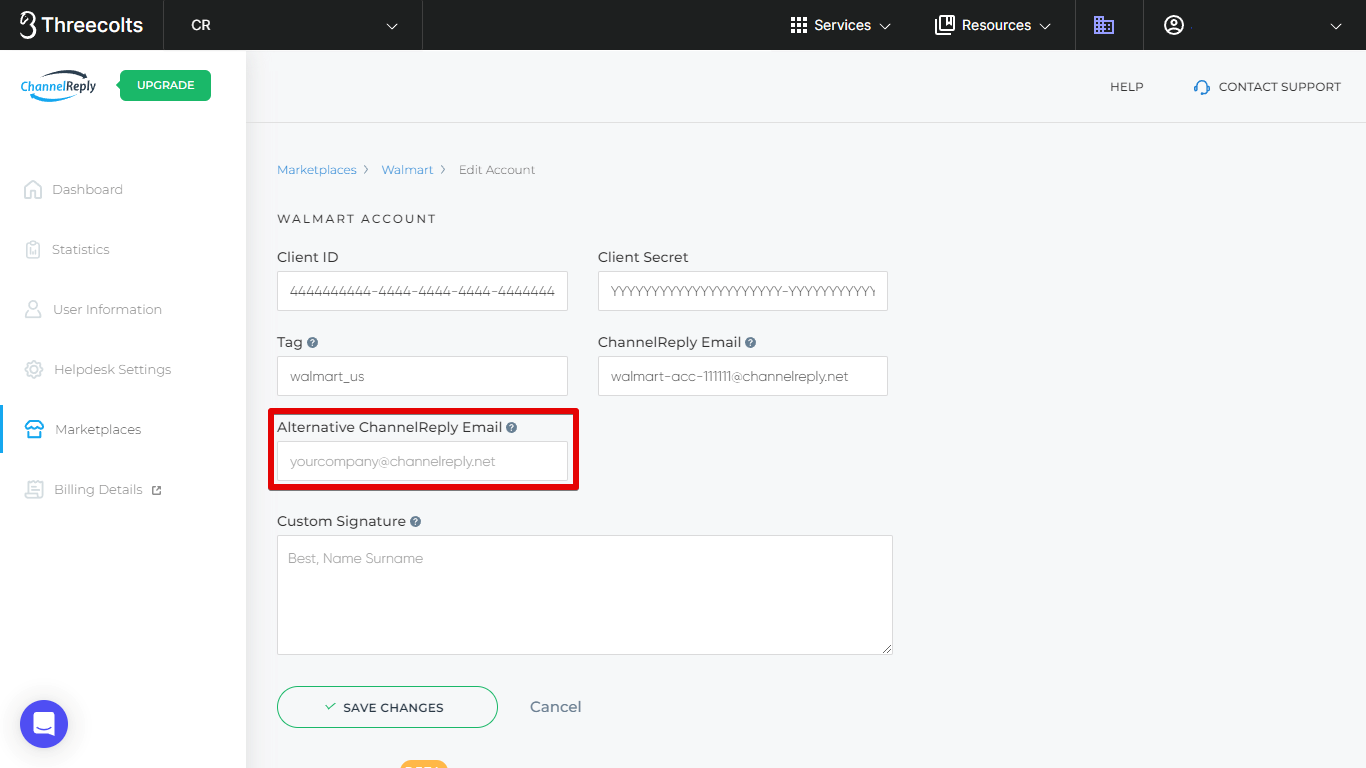
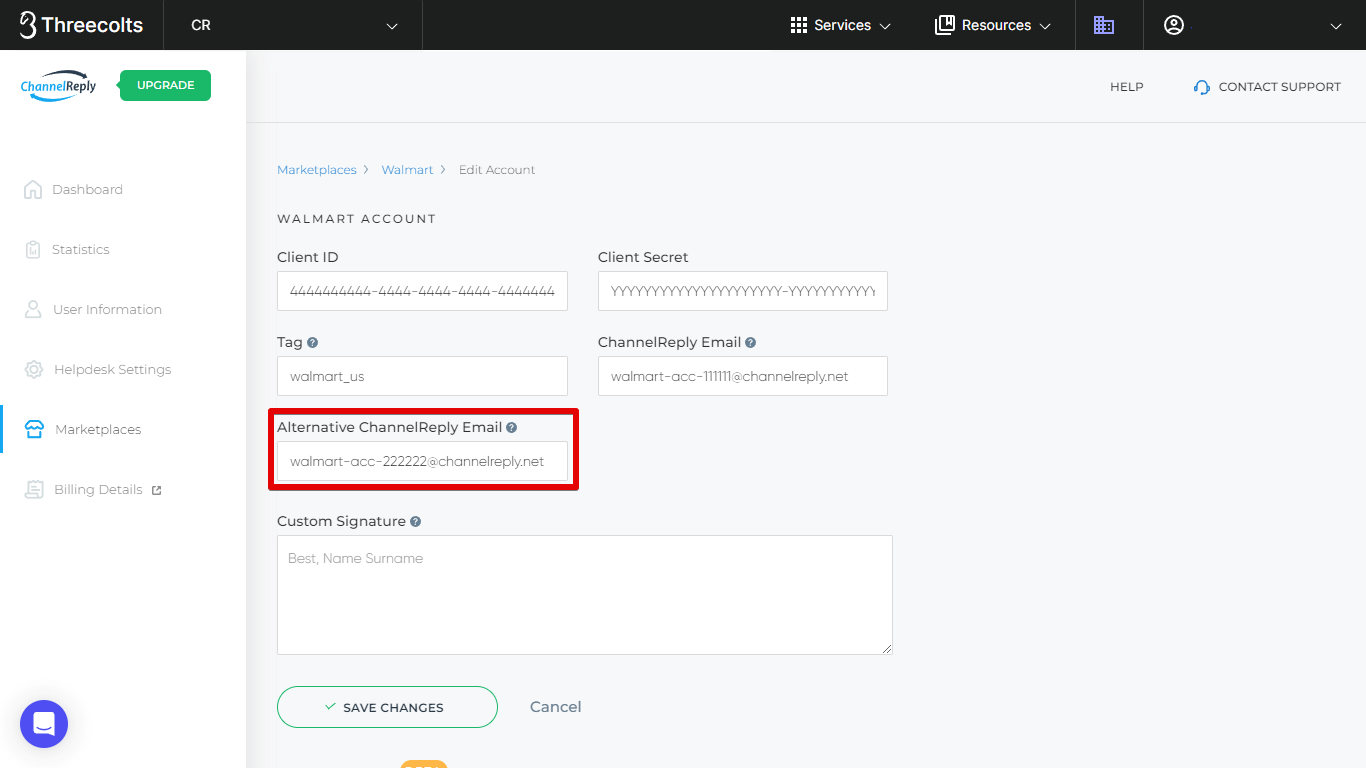
ChannelReply Email & Alternative ChannelReply Email
You can change your ChannelReply Email at any time. However, if you change it without preparing, messaging will stop until you update your email settings.
That's why we've provided the Alternative ChannelReply Email field.
You can enter any unique name you want for the first part of the email. @channelreply.net will automatically be added to the end.
Once you're happy with your Alternative ChannelReply Email, be sure to hit "Save Changes." This will create and enable the email address.
Both email addresses are now fully functional and can deliver Walmart messages and order data. You can safely switch from using one to the other without losing any messages.
All that's left now is to enter your Alternative ChannelReply Email in your email settings. Follow step 3 above if you used our standard Walmart setup. If you used email forwarding with custom SMTP instead, you will need to repeat step 4 of our email forwarding guide.
Custom Signature
You can enter a custom signature that will appear at the end of every reply you send. Note that this will appear in addition to the signature in your helpdesk, if you have one.
Avoid including any links or marketing materials that would violate Walmart communication guidelines in any signature. That goes for any signature in your helpdesk and any you create in ChannelReply. (However, note that you can use our text remover to get rid of links and unwanted text from your helpdesk signature.)
Custom SMTP
The custom SMTP settings let you use a branded email address as your Customer Service Contact in Walmart. This ensures that your customers will never see your ChannelReply Email.
Most Walmart customers will never see your Customer Service Contact email, but there are rare cases in which customers are able to find it.
Setup is a little complicated, but worth it if you want to stay on-brand in every possible situation. See our article on email forwarding with custom SMTP for instructions.
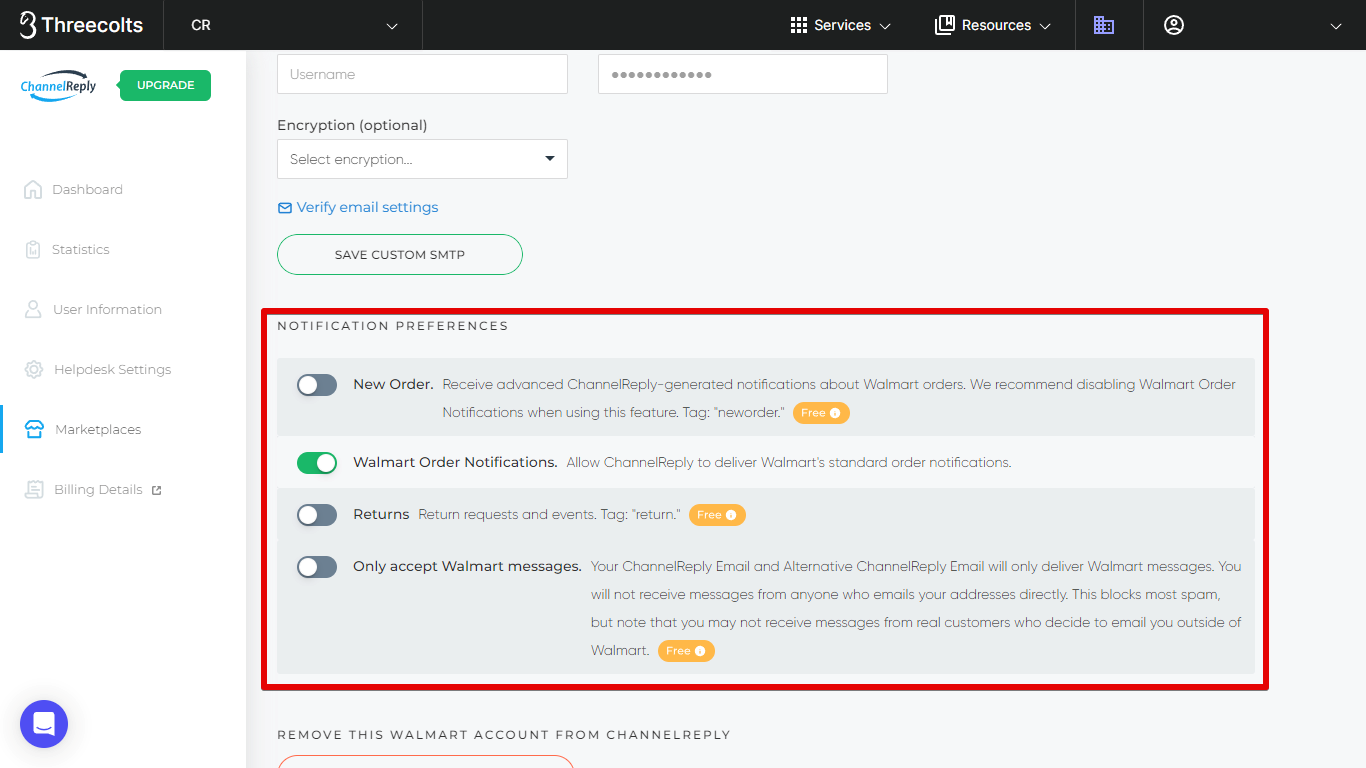
Notification Preferences
The Notification Preferences section gives you control over which messages you'll receive.
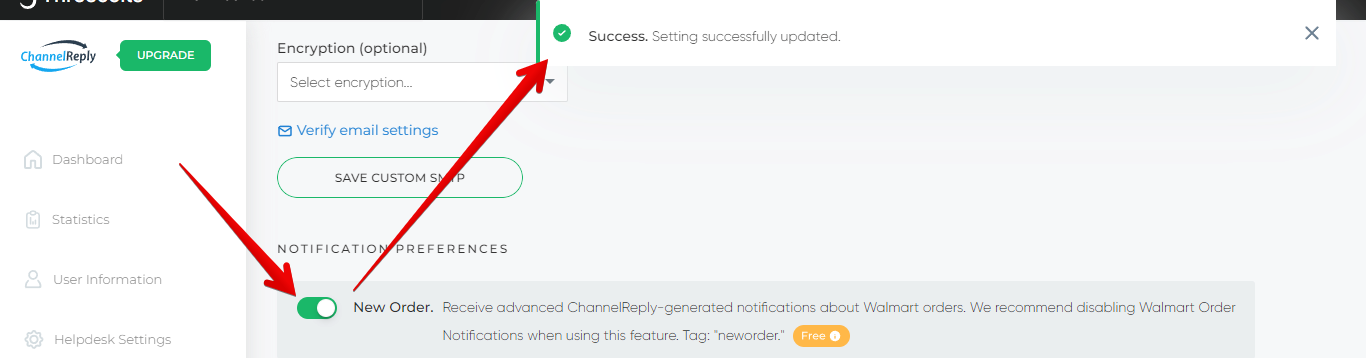
You can enable/disable any of your notification preferences by clicking the slider on the left. A slider that is grey with a knob on the left is disabled. A slider that is green with the knob on the right is enabled. Any changes you make will be saved automatically.
Above: Enabling New Order notifications. Clicking on the slider has turned it green and moved the knob to the right, indicating that it is enabled. The notification at the top of the screen shows that the change was successfully updated and auto-saved.
New Order
New Order notifications are ChannelReply's upgraded version of standard order notifications. These are completely free (they don't count toward your message limit), and they come with all kinds of advanced features:
- Reply directly to contact the customer who placed the order. No need to copy and paste their email address!
- Take actions: acknowledge orders, cancel orders, and update shipping statuses as needed.
- View full order details alongside the notification.
You can learn more in our New Order notifications guide. It has a few cool tricks, like creating "Thank you for your order" autoresponders!
New Order notifications are disabled by default. You must enable them if you want to receive them.
Automatic tag: "neworder"
Walmart Order Notifications
By default, ChannelReply delivers all messages sent to your Customer Service Contact on Walmart. That typically includes your standard order notifications. As a result, these count toward your messaging limit.
These notifications are enabled by default. We recommend disabling them if you want to use our free New Order notifications instead. You should also turn them off if you don't want any Walmart order notifications in your helpdesk at all.
Returns
Our API-based return notifications allow you to issue refunds on Walmart return requests. These are free, but disabled by default. You must enable them if you want to manage Walmart returns from your helpdesk.
Above: Issuing a refund on a Walmart return notification in Re:amaze with ChannelReply.
Automatic tag: "Return"
Only Accept Walmart Messages
When this is enabled, ChannelReply will block all emails sent directly to your Customer Service Contact email address. Only messages originating on Walmart will be delivered. (For example, Walmart notifications and customer messages sent via the Walmart messaging system will all be delivered.)
This can block virtually all spam. However, if a customer finds your email address and contacts you directly, their message will be blocked.
If you have gone through the effort of setting up email forwarding with custom SMTP, we do not recommend enabling this option.
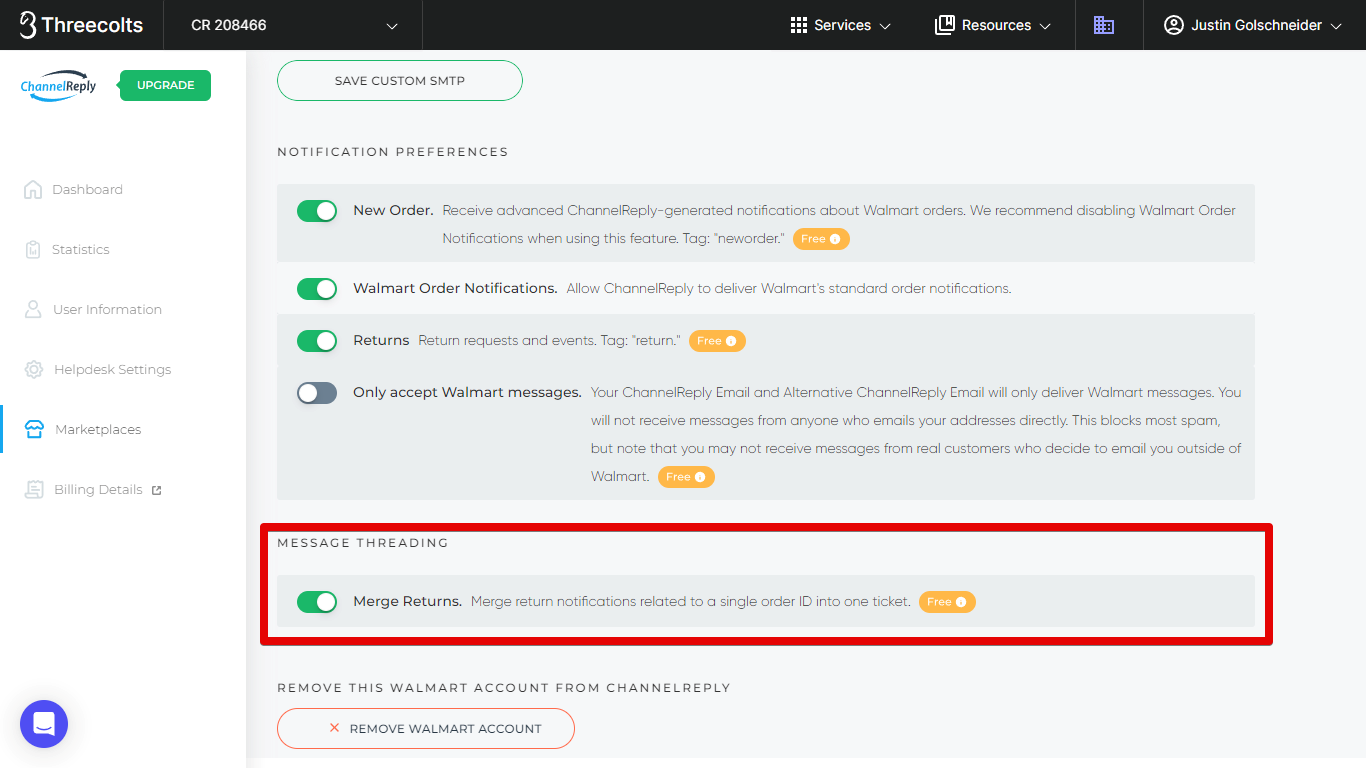
Message Threading
This section only appears if you have enabled Returns.
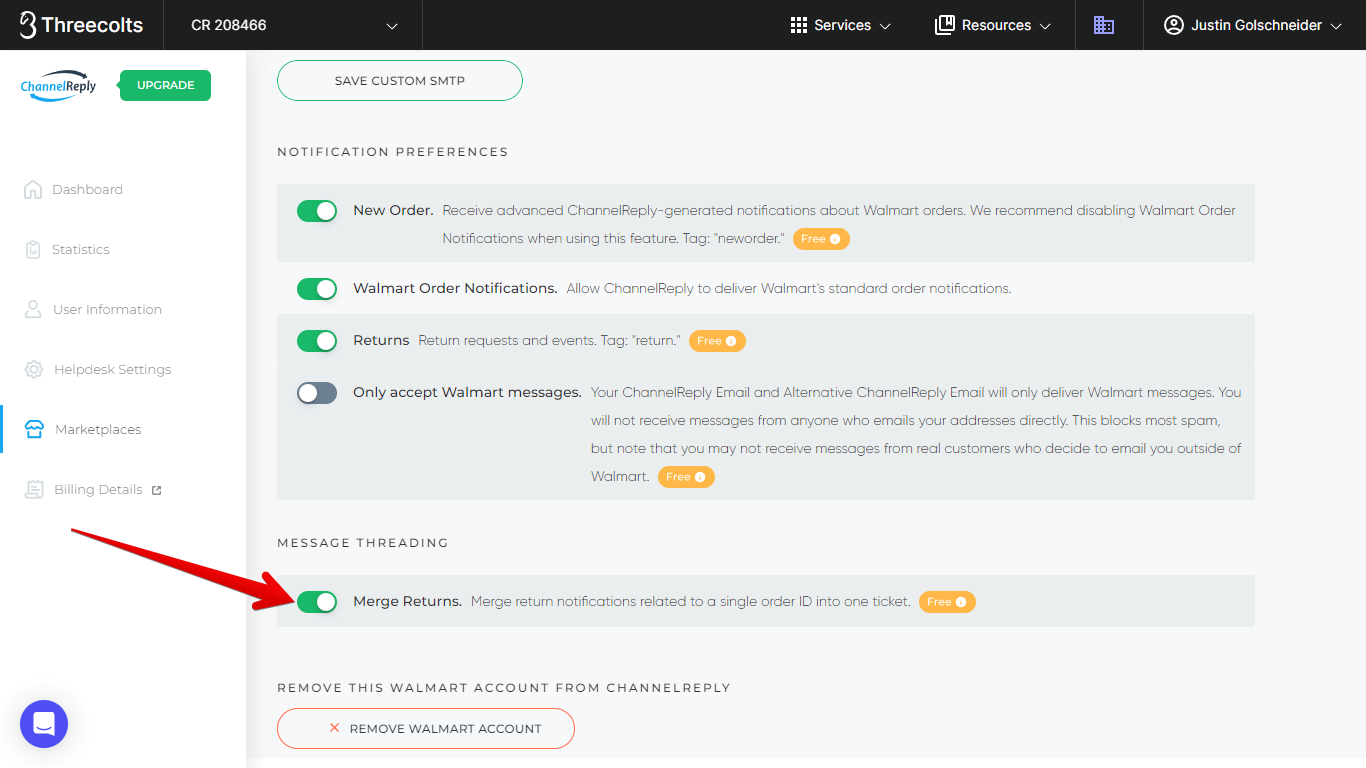
Merge Returns
A large number of return notifications can be generated about a single return. The "Merge Returns" setting threads all notifications about a single order ID into one ticket. That way, you'll only receive a new return ticket if a return is requested about a different order.
This setting is enabled by default. If you disable it, every Walmart return notification you receive will create a separate ticket.
Above: The Merge Returns slider, currently enabled.
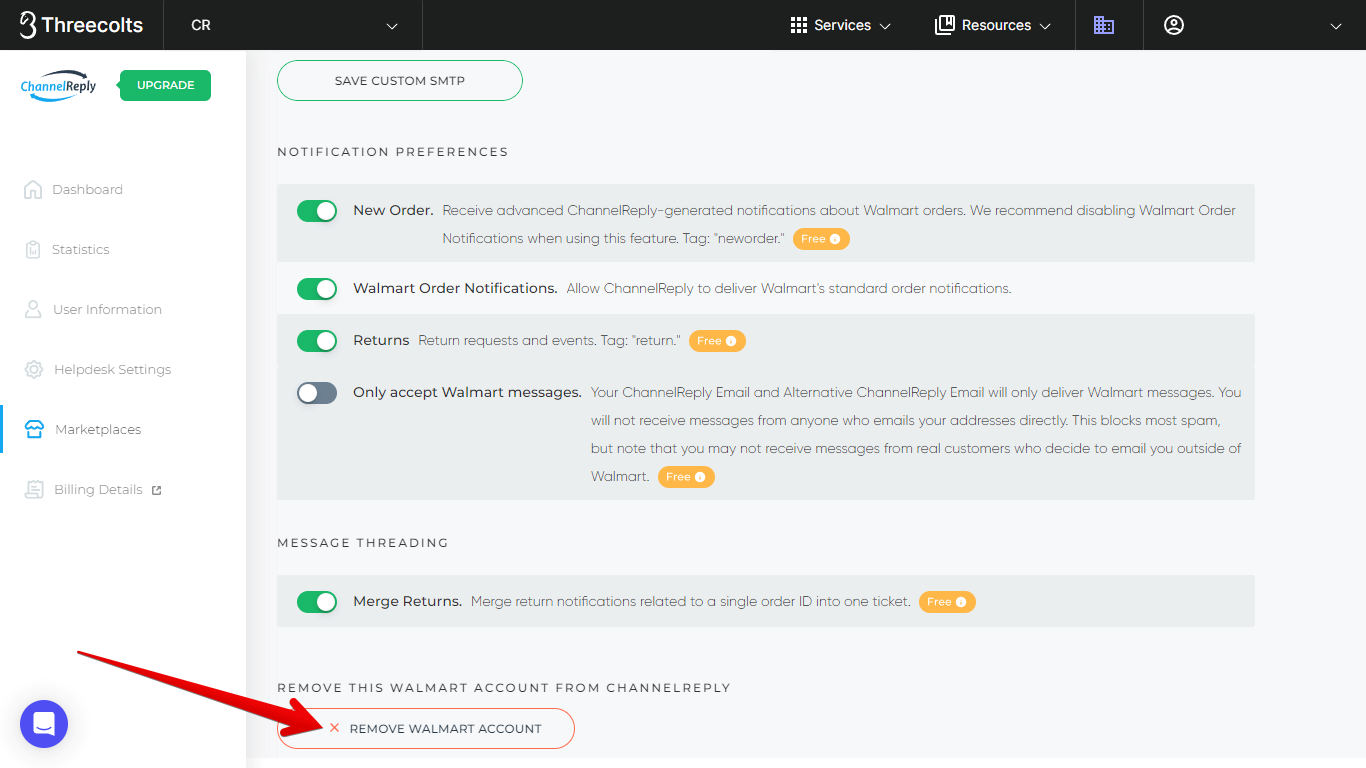
Remove This Walmart Account from ChannelReply
Click “REMOVE WALMART ACCOUNT” if you ever want to disconnect your Walmart account from ChannelReply. Confirming removal completely revokes ChannelReply’s access to the account and deletes it from our system.
Advanced Setup Tips
There are a lot of ways to take your Walmart integration to the next level!
Custom Fields / Variables
Custom fields or variables let you use Walmart order data in your helpdesk's most advanced tools. Depending on your helpdesk, you may be able to use Walmart data in canned replies, autoreplies, reports, automations, and/or ticket views. This can save your team an incredible amount of time!
For more info and links to setup instructions, see our custom fields FAQ.
Autoresponders
We've built Walmart autoresponder systems for almost every helpdesk we support. Click on the name of your helpdesk for instructions: Zendesk, Freshdesk, Zoho Desk, Gorgias, Re:amaze, Help Scout or Kustomer. Note: A system for Onsite Support is currently in development.
Text Remover
Walmart forbids sellers from including non-Walmart links and marketing/promotional materials in messages. If you normally have links in your signature, or if you're worried about your agents making a mistake, set up our text remover. This will auto-delete any specific unwanted links or text from all of your messages to Walmart customers.
Need Help?
Please don’t hesitate to contact us if you’ve gotten stuck or have any questions.